
WalletConnect Tutorial: Create User Sessions with Web3Modal
Learn how to use WalletConnect's Web3Modal toolset to create Ceramic user sessions in this interactive technical tutorial.

WalletConnect offers Web3 developers powerful tools to make building secure, interactive, and delightful decentralized applications easier. This tooling incorporates best-in-class UX and UI with a modular approach to a suite of SDKs and APIs. For many teams looking to accelerate their development cadence without sacrificing security or quality, WalletConnect's various SDKs are an obvious choice.
One of our favorites is Web3Modal - a toolset that provides an intuitive interface for dApps to authenticate users and request actions such as signing transactions. Web3Modal supports multiple browser wallets (such as MetaMask and Trust Wallet) and offers thorough instruction in their documentation to help developers get up and running across multiple frameworks (React, Next, Vue, etc). For this tutorial, we will show how to use WalletConnect's Web3Modal for user authentication and the creation of user sessions.
Ready? Awesome! Let's get started
What Will We Build?
For this tutorial, we will build an application to track event attendance. The use case here is somewhat basic - imagine a conference that wants to keep track of which participants went to which event. They might allow participants to scan a QR code that takes them to this application where they can sign in (with their wallet), optionally opt into sharing their location, and generate a badge showing that they attended.
Here's a simple visual of the user flow:
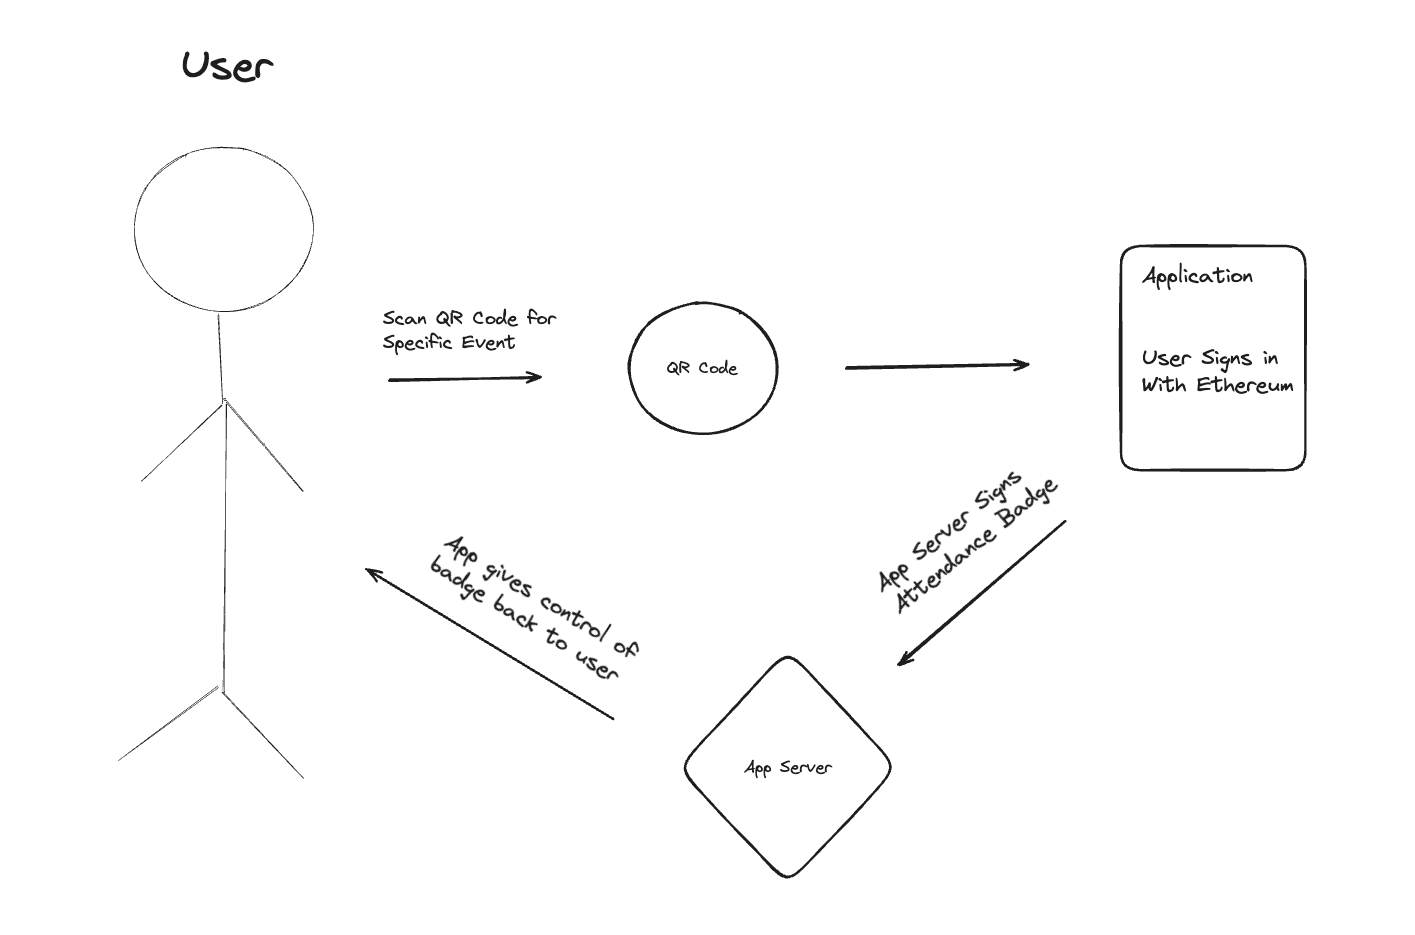
Based on the summary above, it might be obvious where Web3Modal fits in. That's right - we will be using this SDK to authenticate users and keep track of who attended what event based on their wallet address.
We've made up two imaginary events to align with this use case:
- Encryption Event
- Wallet Event
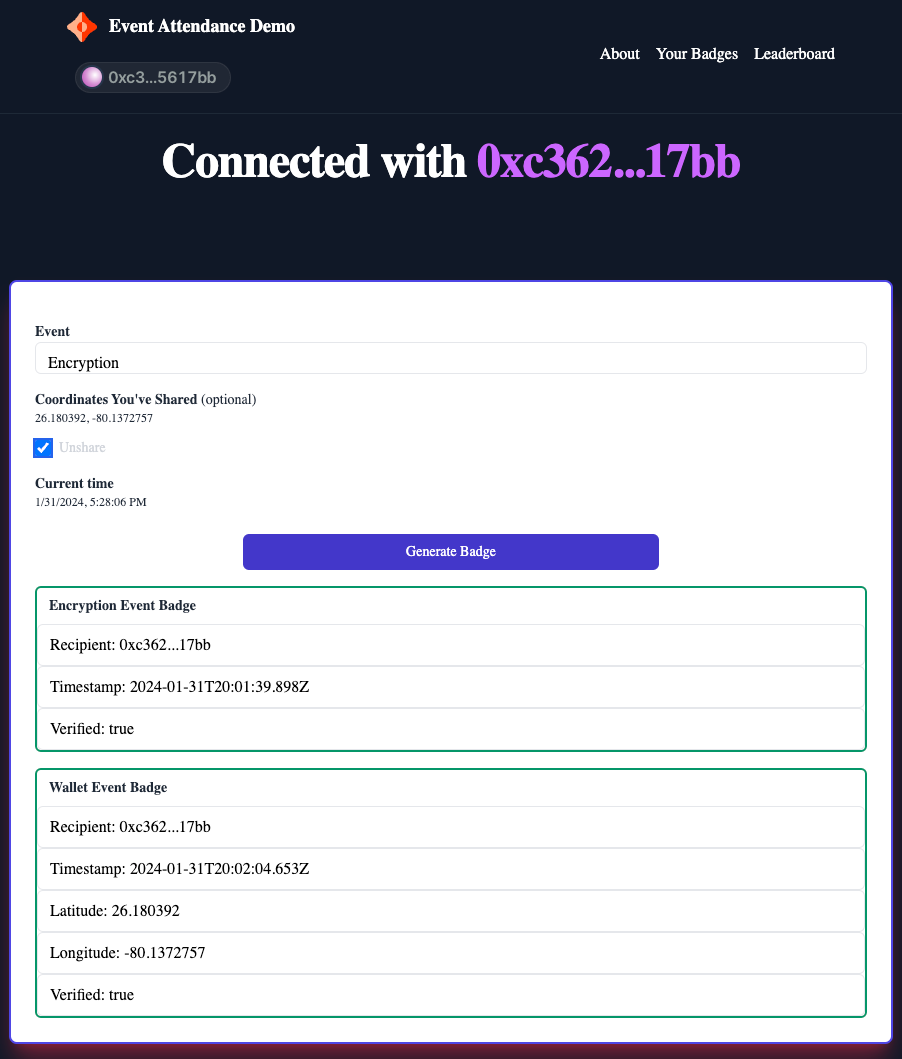
Below is a sneak peek at our app's UI:
What's Included in Our Technical Stack?
To power this simple application, we will need a few things:
- A frontend framework that runs in the attendee's browser and a backend to handle any internal API calls we'll need - we will use NextJS
- Wallet tooling so we don't have to build authentication logic from scratch - Web3Modal
- React hooks that work with our browser wallet so we don't have to build these either - we'll use Wagmi
- Decentralized data storage - we'll use ComposeDB (graph database built on Ceramic)
Why ComposeDB?
If dealing with potentially thousands (or more) attendees to these imaginary events (as is often the case with large conferences), storing these records on-chain would be both costly and inefficient. Each record would incur gas fees, and querying the blockchain across tens of thousands of records would be arduous.
Nonetheless, we want our application to give data control to the users who attend the events. And, in our imaginary use case, other conferences must have access to this data (not just our application) so they can determine who should receive admission priority. We will therefore require some sort of decentralized data network.
In Ceramic (which is what ComposeDB is built on), user data is organized into verifiable event streams that are controlled exclusively by the user account that created each stream. Since Ceramic is a permissionless open data network, any application can easily join and access preexisting user data (which meets one of the requirements listed above).
Applications that build on Ceramic/ComposeDB authenticate users (using sign-in with Ethereum), creating tightly-scoped permission for the application to write data to the network on the user's behalf. This is important for us because our application's server will need to cryptographically sign the badge (to prove the badge was indeed generated through our application) before saving the output in Ceramic on the user's behalf.
Finally, ComposeDB adds a graph database interface on top of Ceramic, making it easy to query, filter, order, and more (using GraphQL) across high document volumes - an ideal fit for any teams who want to consume these badges and perform computation over them in an efficient manner.
We will go into more detail throughout this tutorial.
Getting Started
We have set up a special repository for you to help guide you through - keep in mind that we will need to add to it using the below steps for it to work.
Start by cloning the demo application repository and install your dependencies:
git clone https://github.com/ceramicstudio/walletconnect-tutorial
cd walletconnect-tutorial
npm install
Go ahead and open the directory in your code editor of choice. If you take a look at your package.json file, you'll see our@web3modal/wagmi and wagmi packages mentioned above, as well as several @ceramicnetwork and @composedb packages to meet our storage needs.
Obtain a WalletConnect Project ID
While your dependencies are downloading, you can create a WalletConnect project ID (which we'll need to configure our Web3Modal - more information on their docs). You can do so for free by visiting their WalletConnect Cloud site, creating a new project (with the "App" type selected), and a name of your choosing:
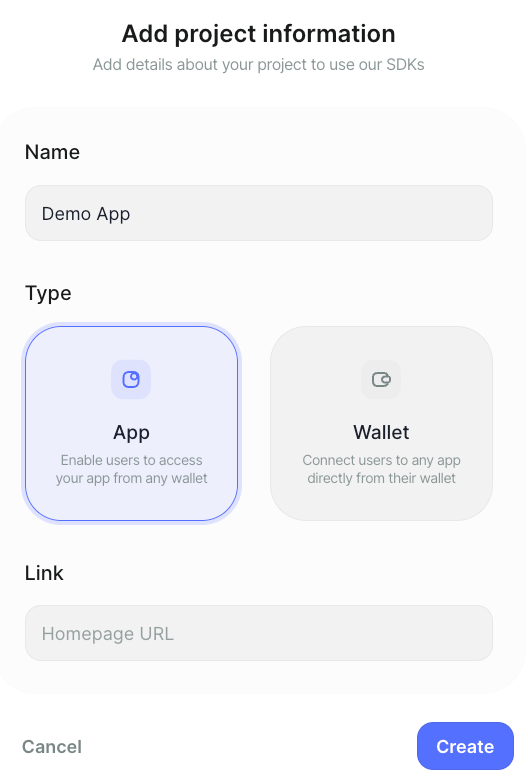
After you click "Create" you will be directed to the settings page for the project you just set up. Go ahead and copy the alphanumeric value you see next to "Project ID."

Back in your text editor, navigate to your /src/pages/_app.tsx file and enter the ID you just copied into the blank field next to the projectId constant. Notice how we use this ID and a mainnet chain setting when defining our wagmiConfig (later used to create our Web3Modal). Just as the Web3Modal docs instructed, we are setting up these functions outside our React components, and wrapping all child components with our WagmiConfig wrapper:
const projectId = '<your project ID>'

const chains = [mainnet]
const wagmiConfig = defaultWagmiConfig({ chains, projectId })

createWeb3Modal({ wagmiConfig, projectId, chains })


const MyApp = ({ Component, pageProps }: AppProps) => {
  return (
    <WagmiConfig config={wagmiConfig}>
    <ComposeDB>
      <Component {...pageProps} ceramic />
      </ComposeDB>
    </WagmiConfig>
  );
}

export default MyApp
We can now make our Web3Modal button accessible to child components of our application to allow our users to sign in. If you take a look at /src/components/nav.tsx, you'll see that we placed our <w3m-button /> component directly into our navigation to allow users to sign in/out on any page of our application (at the moment our application only has 1 page).
Notice how we make use of the size and balance properties - these are two of several settings developers can use to further customize the modal's appearance. These two in particular are fairly simple to understand - one alters the size of the button, while the other hides the user's balance when the user is authenticated.
Finally, you probably noticed in your /src/pages/_app.tsx file that we're also utilizing a <ComposeDB> context wrapper. This is what we will explain next.
Create a ComposeDB Configuration
Now that we've created our Wagmi configuration, we will need to set up our ComposeDB data storage. There are several steps involved (all of which have been taken care of for you). These include:
- Designing the data models our application will need
- Creating a local node/server configuration for this demo (in production)
- Deploying our data models onto our node
- Defining the logic our application will use to read from + write to our ComposeDB node
Data Models
If you take a look at your /composites folder, you'll see an /attendance.graphql file where we've already defined the models our application will use. In ComposeDB, data models are GraphQL schema that contain the requirements for a single piece of data (a social post, for example), in addition to its relations to other models and accounts. Since Ceramic is an open data network, developers can build on preexisting data models (you can explore tools like S3 to observe existing schema), or define brand new ones for your app.
In our case, our application will leverage a general event interface that our two event types will implement:
interface GeneralAttendance
  @createModel(description: "An interface to query general attendance") {
  controller: DID! @documentAccount
  recipient: String! @string(minLength: 42, maxLength: 42)
  latitude: Float
  longitude: Float
  timestamp: DateTime!
  jwt: String! @string(maxLength: 100000)
}

type EncryptionEvent implements GeneralAttendance
  @createModel(accountRelation: SINGLE, description: "An encryption event attendance") {
  controller: DID! @documentAccount
  recipient: String! @string(minLength: 42, maxLength: 42)
  latitude: Float
  longitude: Float
  timestamp: DateTime!
  jwt: String! @string(maxLength: 100000)
}

type WalletEvent implements GeneralAttendance
  @createModel(accountRelation: SINGLE, description: "A wallet event attendance") {
  controller: DID! @documentAccount
  recipient: String! @string(minLength: 42, maxLength: 42)
  latitude: Float
  longitude: Float
  timestamp: DateTime!
  jwt: String! @string(maxLength: 100000)
}
Notice how we've set the accountRelation field for both types to "SINGLE" - what this means is that 1 user can only ever have 1 model instance of that type, thus creating a 1:1 account relationship. This is contrasted with "LIST" accountRelation which would indicate a 1:many relationship.
You'll also notice that our latitude and longitude fields do not use a ! next to their scalar definition - what this means is that they are optional, so a model instance can be created with or without these fields defined.
Finally, we will use our jwt field to record the signed badge payload our server will create for the user. Since the user will ultimately be in control of their data, a potentially deceptive could try to change the values of their model instance outside the confines of our application. Seeing as our architecture requires a way for both our application and other conferences to read and verify this data, the jwt field will create tamper-evident proof against the values by tying the cryptographic signature of our application's DID together with the data.
Create a Local Server Configuration
Seeing as this is just a demo application and we don't have a cloud-hosted node endpoint to access, we will define a server configuration to run locally on our computer. While there are multiple server settings an application can leverage, the key items to know for this demo are the following:
- Our app will run
inmemorywhereas a production application will usemainnetfor their network setting - Our server will define
sqliteas our SQL index, whereas a production application would usePostgreSQL - Our IPFS will run in
bundledmode (ideal for early prototyping), whereas a production application will run inremote
Finally, each Ceramic node is configured with an admin DID used to authenticate with the node and perform tasks like deploying models. This is different from the DIDs end users will use when authenticating themselves using their wallet and writing data to the network.
Fortunately for you, we've taken care of this for you by creating a command. Simply run the following in your terminal once your dependencies are installed:
npm run generateIf you take a look at your admin_seed.txt file you will see the admin seed your Ceramic node will use. Your composedb.config.json file is where you'll find the server configuration you just created.
Deploying the Models onto Our Node
Seeing as we're not using a preexisting node endpoint that's already set up to index the data models we care about, we'll need a way to deploy our definitions onto our node. If you look at /scripts/composites.mjs you'll find a writeComposite method we've created for you that reads from our GraphQL file, creates an encoded runtime definition and deploys the composite onto our local node running on port 7007.
The important thing to take note of here is how the writeEncodedCompositeRuntime method generates a definition in our definition.js file. We will explain in the next step how this is used by our client-side library to allow our application to interact with these data models and our Ceramic node.
Don't take any action yet - we will explain how to use this script in the coming steps.
Integrating ComposeDB with Our Application
Finally, as mentioned above, we will need a way for our application to read from and write to our ComposeDB node. We will also need a way to combine our Web3Modal authentication logic with the need to authenticate users onto our node.
If you take a look at /src/fragments/index.tsx you'll find a ComposeDB component that allows us to utilize React's createContext hook and create a wrapper of our own. Since we know Web3Modal will make use of our wallet client, we can leverage the wallet client to request a Ceramic user session authentication from our user.
Observe the following:
const CERAMIC_URL = process.env.URL ?? "http://localhost:7007";

/**
 * Configure ceramic Client & create context.
 */
const ceramic = new CeramicClient(CERAMIC_URL);

const compose = new ComposeClient({
  ceramic,
  definition: definition as RuntimeCompositeDefinition,
});

let isAuthenticated = false;

const Context = createContext({ compose, isAuthenticated });

export const ComposeDB = ({ children }: ComposeDBProps) => {
  function StartAuth() {
    const { data: walletClient } = useWalletClient();
    const [isAuth, setAuth] = useState(false);

    useEffect(() => {
      async function authenticate(
        walletClient: GetWalletClientResult | undefined,
      ) {
        if (walletClient) {
          const accountId = await getAccountId(
            walletClient,
            walletClient.account.address,
          );
          const authMethod = await EthereumWebAuth.getAuthMethod(
            walletClient,
            accountId,
          );
          const session = await DIDSession.get(accountId, authMethod, {
            resources: compose.resources,
          });

          await ceramic.setDID(session.did as unknown as DID);
          console.log("Auth'd:", session.did.parent);
          localStorage.setItem("did", session.did.parent);
          setAuth(true);
        }
      }
      void authenticate(walletClient);
    }, [walletClient]);

    return isAuth;
  }

  if (!isAuthenticated) {
    isAuthenticated = StartAuth();
  }

  return (
    <Context.Provider value={{ compose, isAuthenticated }}>
      {children}
    </Context.Provider>
  );
};
Notice how we're using the wallet client's account address to initiate a DID session that asks for specific resources from compose. If you track deeper, you'll see that compose was instantiated using the definition imported from the file our deployment script wrote into. This allows us to access a limited scope to write data on the user's behalf specifically for the data models our application uses (these sessions auto-expire after 24 hours).
Finally, to bring this full circle, back to our /src/pages/_app.tsx file, you should now understand how we're able to use ComposeDB as a contextual wrapper, enabling us to access both the ComposeDB client libraries and our model definitions from within any child component. For example, if you take a look at /src/components/index.tsx you'll see how we're now able to utilize our useComposeDB hook that allows us to run queries against our node's client.
Create a Seed for our Application's Server DID
We mentioned above that we'll want our application to sign each badge payload before handing document control back to the end user. While this flow will not always be the case (read this blog on common data control patterns in Ceramic for more), we'll want to implement this to ensure the verifiability of the data.
In /src/pages/api/create.ts we've created an API our application's server will expose that does exactly this - it intakes the data relevant to the event, uses a SECRET_KEY environment variable to instantiate a static DID, and returns a Base64 string-encoded JSON web signature containing the signed data.
We will therefore need to create a separate static seed to store in a .env file that we'll create:
touch .envFor this tutorial, enter the following key-value pair into your new file:
SECRET_KEY="11b574d316903ced6cc3f4787bbcc3047d9c72d1da4d83e36fe714ef785d10c1"
When you use the above seed to instantiate a DID, this will yield the following predictable did:
did:key:z6MkqusKQfvJm7CPiSRkPsGkdrVhTy8EVcQ65uB5H2wWzMMQ
If you look back into /src/components/index.tsx you'll see how our lengthy getParams the method performs a quick check against any existing EncryptionEvent or WalletEvent badges the user already holds to test whether the jwt value was indeed signed by our application (a more thorough version of this could include verifying that the signed data matches the same values from the other fields, but we'll leave that up to you to add).
That's it! We are finally ready to run our application!
Running the Application
Now that we've set up everything we need for our app to run locally, we can start it up in developer mode. Be sure to select the correct node version first:
nvm use 20
npm run dev
Once you see the following in your terminal, your application is ready to view in your browser:
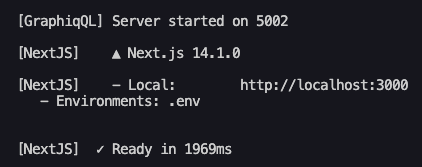
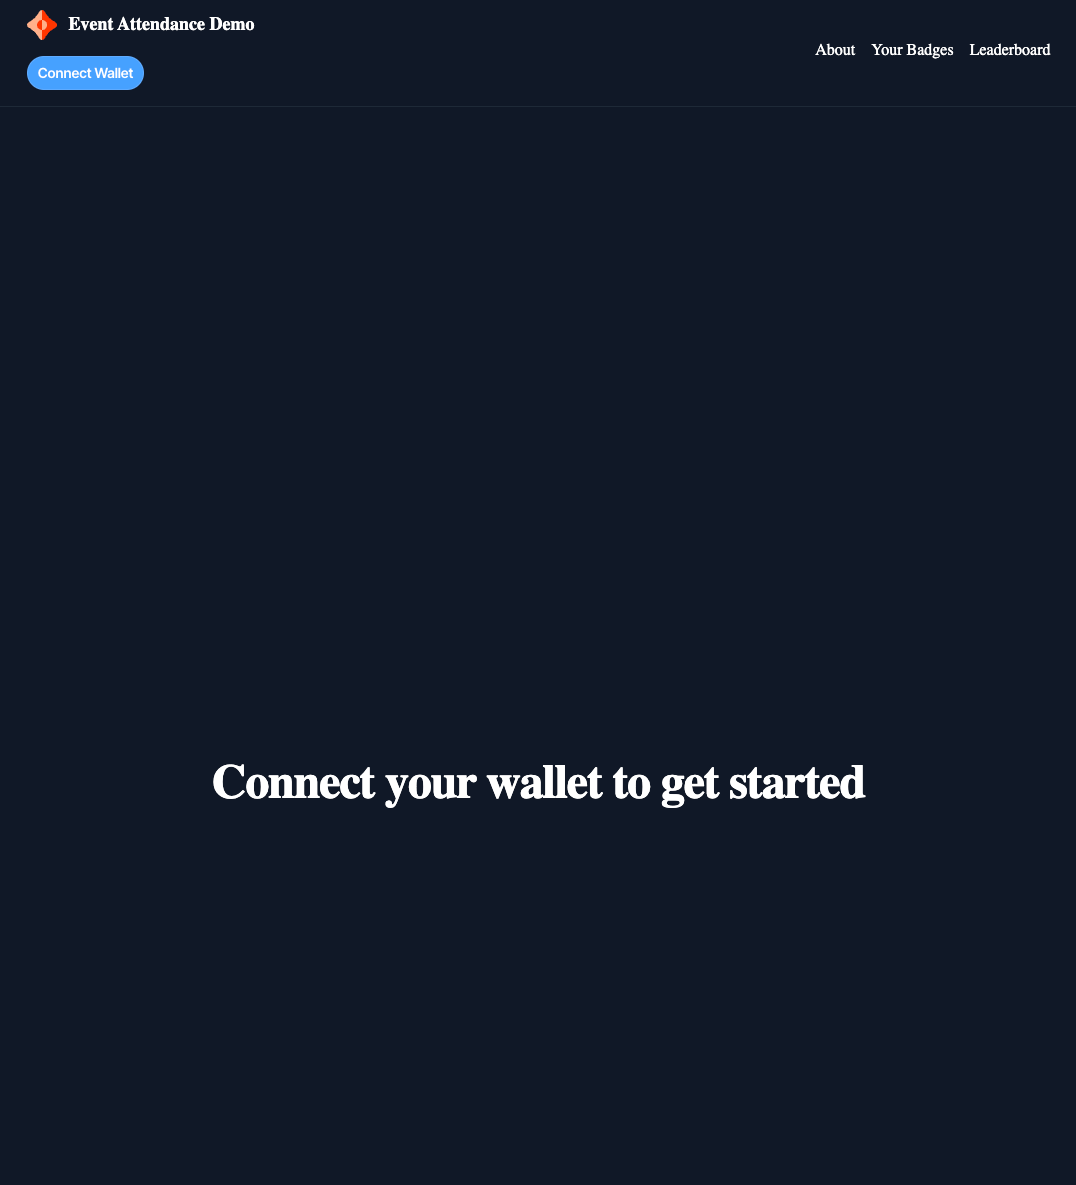
In your browser, navigate to http://localhost:3000 - you should see the following:
Signing in with Web3Modal
As mentioned above, we've made our Web3Modal accessible from our navigation which is where our "Connect Wallet" button is coming from. Go ahead and give this button a click and select your wallet of choice.
During the sign-in cadence, you will notice an additional authorization message appear in your wallet that looks something like this:
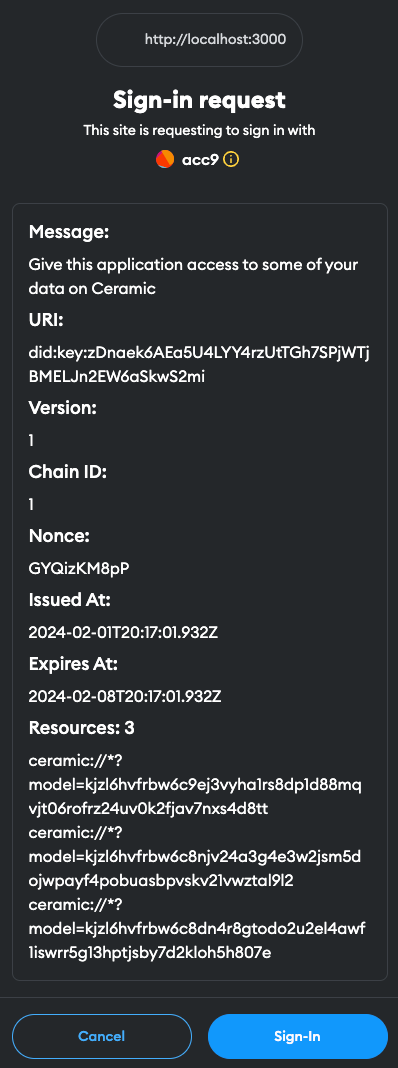
If you recall what we covered in the "Integrating ComposeDB with Our Application" section above, you'll remember that we discussed how we created a DIDSession by requesting authorization over the specific resources (data models) our application will be using. These are the 3 items listed under the "Resources" section of the sign-in request you should see.
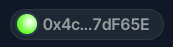
Finally, after you've signed in, your Web3Modal will now show a truncated version of your address:
Creating Badges
As you can see, our application does not allow the user to input which event they have attended - this will be determined based on the URL the QR code sends the user with the following format:
http://localhost:3000/?event={event id}
Take a look at your browser console - you should see logs that look similar to this:

We've preset these logs for you by reading from our runtime composite definition that we've imported into the /src/components/index.tsx component. Go ahead and copy one of those fields and construct your URL to look something like this:
http://localhost:3000/?event=kjzl6hvfrbw6c8njv24a3g4e3w2jsm5dojwpayf4pobuasbpvskv21vwztal9l2
If you've copied the stream ID corresponding to the EncryptionEvent model, your UI should now look something like this:
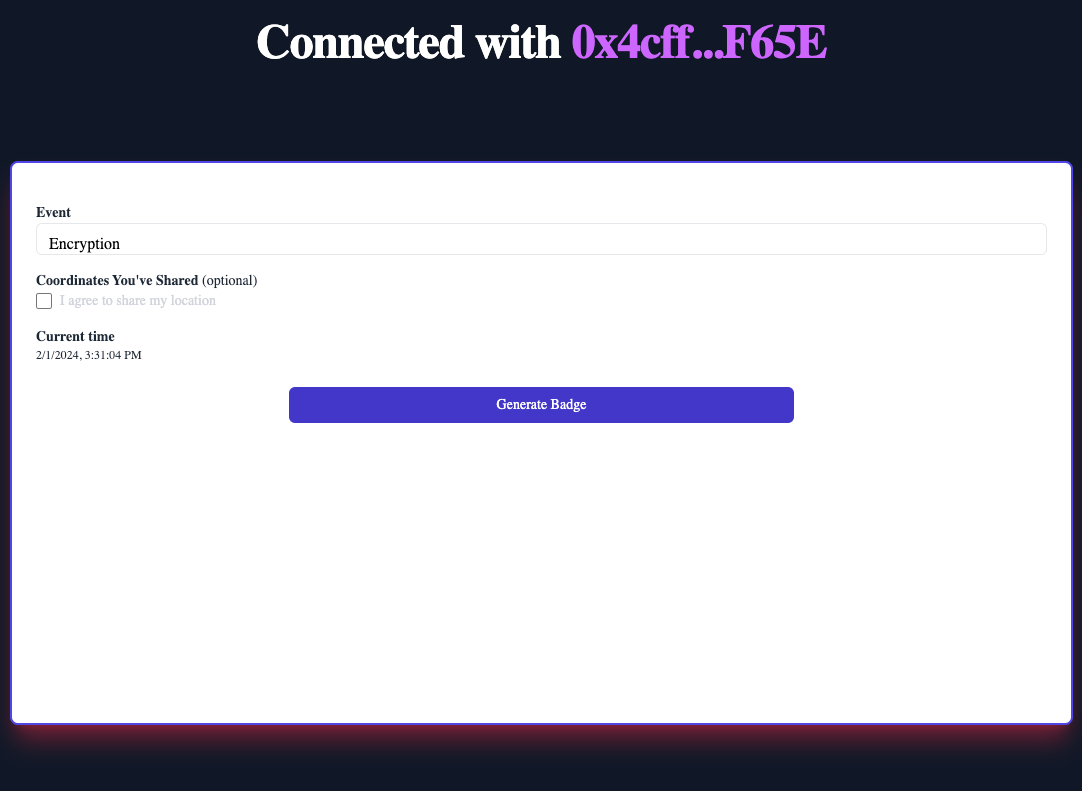
You can optionally select to share your coordinates. Finally, go ahead and create a badge for whichever event you entered into your URL:

If you navigate back to your /src/components/index.tsx file you can observe what's happening in createBadge. After calling our /api/create route (which uses our application server's static DID to sign the event data), we're performing a mutation query that creates an instance of whichever event aligns with the identifier you used in your URL parameter. Since our user is the account currently authenticated on our node (from the creation of our DID session), the resulting document is placed into the control of the end user (with our tamper-evident signed data entered into the jwt field).
If you take a look at our getParams method in our /src/components/index.tsx file, you'll notice that we've created a query against our ComposeDB node that runs both within our useEffect React hook as well as after every badge creation event. Notice how we're querying based on the user's did:pkh: did:pkh:eip155:${chainId}:${address?.toLowerCase()}
If you take a look at our chainId and address assignments, you'll realize these are coming from our Wagmi hooks we mentioned we'd need (specifically useAccount and useChainId).
What's Next?
We hope you've enjoyed this fairly straightforward walk-through of how to use WalletConnect's Web3Modal toolkit for authenticating users, creating user sessions in Ceramic, and querying ComposeDB based on the authenticated user! While that's all for this tutorial, we encourage you to explore the other possibilities and journies Ceramic has to offer. Below are a few we'd recommend:
Test Queries on a Live Node in the ComposeDB Sandbox
Build an AI Chatbot on ComposeDB
Create EAS Attestations + Ceramic Storage
Finally, we'd love for you to join our community: