
How to build a simple notes app with IDX
Learn how to build a simple note taking application where users own their data with IDX and React.


Introduction
IDX is a protocol for building applications with user-centric, interoperable data. In a previous post, we described what IDX is and the benefits of building applications in this way. This tutorial will walk through the creation of a simple note-taking web app using decentralized technologies for authentication and data storage, allowing users to have complete ownership over their contents.
In this tutorial, we will use the following technologies:
- React: a popular framework for building web applications
- IDX: a JavaScript/TypeScript framework for user-centric data management
- Ceramic: a decentralized network for storing mutable, verifiable data
- DIDs: a W3C standard for decentralized identifiers

Environment setup
To get started using IDX, we'll first need to install the IDX CLI using npm. You'll also need to have node installed.
npm install -g @ceramicstudio/idx-cliProject setup
Initial dependencies
We'll use Create React App with the TypeScript template to setup our project:
npx create-react-app idx-demo-app --template typescript --use-npm
Then we'll add the first dependencies:
cd idx-demo-app
npm install @ceramicnetwork/cli @ceramicnetwork/http-client @ceramicstudio/idx-tools key-did-provider-ed25519 uint8arrays
Let's also edit the package.json file to add the following scripts:
"bootstrap": "node ./bootstrap.js",
"ceramic": "ceramic daemon",
Finally, as the uint8arrays package does not provide TypeScript definitions, let's add them to the src/react-app-env.d.ts file:
/// <reference types="react-scripts" />

declare module 'uint8arrays' {
  export function toString(b: Uint8Array, enc?: string): string
  export function fromString(s: string, enc?: string): Uint8Array
}Local Ceramic node
Let's start a local Ceramic node using the script defined, and keep it running for all the steps of this tutorial:
npm run ceramicWe'll also need to bootstrap the local node with the IDX documents, using the IDX CLI previously installed:
idx bootstrapData model
By using Ceramic and IDX, we can create a data model for our application that is user-centric (instead of application-siloed), globally available from any client on the Ceramic network, and publicly discoverable and shareable across any application(s) that a user interacts with. This is all made possible thanks to public schemas, data definitions, and the user's IDX document. Thus, by storing your application's user data in the IDX framework, it becomes truly user-centric and portable across app domains and contexts.
- A schema is a JSON-schema document created by a developer which can be used to validate the contents of other documents simply by including the unique identifier (StreamID) of the schema.
- A definition is a document created by a developer which provides metadata about the data that they want to store with the user. The StreamID of the definition acts as a unique key within the user's IDX document, and is used to identify a reference (the actual contents) associated to a specified schema.
- An IDX document is a document owned by a user which maintains an index of all of their data in a single place. It is a key-value store that stores mappings from definitions to references.
For this notes management app, we'll use two types of documents and therefore two schemas:
Note: this document will store the contents of a single noteNotesList: the entry-point document to index the list of notes with metadata
We will need to create and publish these schemas to the local Ceramic node, along with a definition which allows us to interact with the notes list using IDX. This will allow our app and others to access the notes via the following path:
User DID —> IDX index —> notes definition —> notes list —> note 1
                                                        -> note 2
                                                        -> ...
Let's create a bootstrap.js script that will create and publish the schemas and definition to our Ceramic node as TileDocuments, and store the Ceramic stream ID (StreamID) of the definition to a JSON file that will be used by the app:
const { writeFile } = require('fs').promises
const Ceramic = require('@ceramicnetwork/http-client').default
const { createDefinition, publishSchema } = require('@ceramicstudio/idx-tools')
const { Ed25519Provider } = require('key-did-provider-ed25519')
const ThreeIdResolver = require('@ceramicnetwork/3id-did-resolver').default
const KeyDidResolver = require('key-did-resolver').default
const { Resolver } = require('did-resolver')
const { DID } require('dids')
const fromString = require('uint8arrays/from-string')

const CERAMIC_URL = 'http://localhost:7007'

const NoteSchema = {
  $schema: 'http://json-schema.org/draft-07/schema#',
  title: 'Note',
  type: 'object',
  properties: {
    date: {
      type: 'string',
      format: 'date-time',
      title: 'date',
      maxLength: 30,
    },
    text: {
      type: 'string',
      title: 'text',
      maxLength: 4000,
    },
  },
}

const NotesListSchema = {
  $schema: 'http://json-schema.org/draft-07/schema#',
  title: 'NotesList',
  type: 'object',
  properties: {
    notes: {
      type: 'array',
      title: 'notes',
      items: {
        type: 'object',
        title: 'NoteItem',
        properties: {
          id: {
            $ref: '#/definitions/CeramicStreamId',
          },
          title: {
            type: 'string',
            title: 'title',
            maxLength: 100,
          },
        },
      },
    },
  },
  definitions: {
    CeramicStreamId: {
      type: 'string',
      pattern: '^ceramic://.+(\\\\?version=.+)?',
      maxLength: 150,
    },
  },
}

async function run() {
  // The seed must be provided as an environment variable
  const seed = fromString(process.env.SEED, 'base16')
  // Connect to the local Ceramic node
  const ceramic = new Ceramic(CERAMIC_URL)
  // Provide the DID Resolver and Provider to Ceramic
  const resolver = new Resolver({
      ...KeyDidResolver.getResolver(),
      ...ThreeIdResolver.getResolver(ceramic) })
  const provider = new Ed25519Provider(seed)
  const did = new DID({ provider, resolver })
  await ceramic.setDID(did)
  // Authenticate the Ceramic instance with the provider
  await ceramic.did.authenticate()


  // Publish the two schemas
  const [noteSchema, notesListSchema] = await Promise.all([
    publishSchema(ceramic, { content: NoteSchema }),
    publishSchema(ceramic, { content: NotesListSchema }),
  ])

  // Create the definition using the created schema ID
  const notesDefinition = await createDefinition(ceramic, {
    name: 'notes',
    description: 'Simple text notes',
    schema: notesListSchema.commitId.toUrl(),
  })

  // Write config to JSON file
  const config = {
    definitions: {
      notes: notesDefinition.id.toString(),
    },
    schemas: {
      Note: noteSchema.commitId.toUrl(),
      NotesList: notesListSchema.commitId.toUrl(),
    },
  }
  await writeFile('./src/config.json', JSON.stringify(config))

  console.log('Config written to src/config.json file:', config)
  process.exit(0)
}

run().catch(console.error)Now to run this script, we'll need to provide a 32 bytes base16-encoded string as an environment variable:
SEED=<your seed> npm run bootstrap
If you need a simple way to create such a seed, you can use the following command:
node -e "console.log(require('crypto').randomBytes(32).toString('hex'))"
Running the bootstrap script will create a config.json file in the src folder, that will be imported by our app. The schemas and definition StreamIDs contained in this config.json file are globally unique and can be shared with other apps wanting to interact with the notes associated to the user.
Interacting with our data model
Before moving forwards with implementing our app, let's first check we can interact with our data model using the IDX CLI.
First, we'll need to create a local DID that will be used by the CLI:
idx did:create --label=localThe local alias can be used to reference the DID in the following commands, rather than having to provide the full DID string.
Now we can create a note with some text using the Note schema URL added to src/config.json. In my case this URL is ceramic://kjzl6cwe1jw14atxo8ax0mrknm7xfh8pxqy24hbdrxi9nagtwoa3la5s4hf32qr but it will be different when using another seed, so don't forget to change it in the example below:
idx tile:create local '{"text":"My first note"}' --schema=ceramic://kjzl6cwe1jw14atxo8ax0mrknm7xfh8pxqy24hbdrxi9nagtwoa3la5s4hf32qr
Successfully running this command will display the stream ID of the created note, that we can then add to the list of notes using the notes definition key added to src/config.json:
idx index:set local kjzl6cwe1jw14almqh93rmt1mpv8h6zvyeyhh7jzlqp95kgv38c0jb5yuo8mo7w '{"notes":[{"id":"ceramic://kjzl6cwe1jw147xhyjemd6r38812gzhhexw9mj3gz2vvkimotu5xktssik2cbzp","title":"First"}]}'
Make sure to replace the definition key (kjzl6cwe1jw14almqh93rmt1mpv8h6zvyeyhh7jzlqp95kgv38c0jb5yuo8mo7w in my case) and the created note URL (ceramic://kjzl6cwe1jw147xhyjemd6r38812gzhhexw9mj3gz2vvkimotu5xktssik2cbzp in the code above) with the values created in your environment.
We can now check the created note and notes list can be loaded:
idx index:get local kjzl6cwe1jw14almqh93rmt1mpv8h6zvyeyhh7jzlqp95kgv38c0jb5yuo8mo7w
idx tile:get ceramic://kjzl6cwe1jw147xhyjemd6r38812gzhhexw9mj3gz2vvkimotu5xktssik2cbzp
Application dependencies and IDX setup
Our app is going to use the following additional dependencies:
- IDX, to interact with the list of notes
- Material UI for UI components and icons
- A random bytes generator, to generate a seed
npm install @ceramicstudio/idx @material-ui/core @material-ui/icons @stablelib/randomThen, let's create an idx.ts file in the src folder, implementing the logic to authenticate using a provided seed and load notes with IDX:
import Ceramic from '@ceramicnetwork/http-client'
import { IDX } from '@ceramicstudio/idx'
import { Ed25519Provider } from 'key-did-provider-ed25519'
import ThreeIdResolver from '@ceramicnetwork/3id-did-resolver';
import KeyDidResolver from 'key-did-resolver';
import { Resolver } from 'did-resolver';
import { DID } from 'dids';

import { definitions } from './config.json'

const CERAMIC_URL = 'http://localhost:7007'

export type NoteItem = {
  id: string
  title: string
}

export type NotesList = { notes: Array<NoteItem> }

export type IDXInit = NotesList & {
  ceramic: Ceramic
  idx: IDX
}

export async function getIDX(seed: Uint8Array): Promise<IDXInit> {
  // Create the Ceramic instance and inject DID provider and resolver
  const ceramic = new Ceramic(CERAMIC_URL)
  const resolver = new Resolver({
      ...KeyDidResolver.getResolver(),
      ...ThreeIdResolver.getResolver(ceramic) })
  const provider = new Ed25519Provider(seed)
  const did = new DID({ provider, resolver })
  await ceramic.setDID(did)
  await ceramic.did.authenticate()

  // Create the IDX instance with the definitions aliases from the config
  const idx = new IDX({ ceramic, aliases: definitions })

  // Load the existing notes
  const notesList = await idx.get<{ notes: Array<NoteItem> }>('notes')
  return { ceramic, idx, notes: notesList?.notes ?? [] }
}Application state and actions
In this section, we'll implement the core logic of our app based on a state, synchronous actions mutating the state, and high-level handlers performing one or more actions.
First, let's create a state.ts file in the src folder with the following initial contents:
import type { TileDocument } from '@ceramicnetwork/stream-tile'
import type Ceramic from '@ceramicnetwork/http-client'
import type { IDX } from '@ceramicstudio/idx'
import { useCallback, useReducer } from 'react'

import { schemas } from './config.json'
import { getIDX } from './idx'
import type { IDXInit, NotesList } from './idx'

type AuthStatus = 'pending' | 'loading' | 'failed'
export type DraftStatus = 'unsaved' | 'saving' | 'failed' | 'saved'
type NoteLoadingStatus = 'init' | 'loading' | 'loading failed'
type NoteSavingStatus = 'loaded' | 'saving' | 'saving failed' | 'saved'

type UnauthenticatedState = { status: AuthStatus }
type AuthenticatedState = { status: 'done'; ceramic: Ceramic; idx: IDX }
export type AuthState = UnauthenticatedState | AuthenticatedState

type NavDefaultState = { type: 'default' }
type NavDraftState = { type: 'draft' }
type NavNoteState = { type: 'note'; streamID: string }

export type IndexLoadedNote = { status: NoteLoadingStatus; title: string }
export type StoredNote = {
  status: NoteSavingStatus
  title: string
  doc: TileDocument
}

type Store = {
  draftStatus: DraftStatus
  notes: Record<string, IndexLoadedNote | StoredNote>
}
type DefaultState = {
  auth: AuthState
  nav: NavDefaultState
}
type NoteState = {
  auth: AuthenticatedState
  nav: NavDraftState | NavNoteState
}
export type State = Store & (DefaultState | NoteState)Here we are importing types and dependencies from React (the useCallback and useReducer hooks) and defining the valid shapes the application State can have.
Next we'll define an Action type that includes all the possible synchronous actions that can be performed to mutate the State:
type AuthAction = { type: 'auth'; status: AuthStatus }
type AuthSuccessAction = { type: 'auth success' } & IDXInit
type NavResetAction = { type: 'nav reset' }
type NavDraftAction = { type: 'nav draft' }
type NavNoteAction = { type: 'nav note'; streamID: string }
type DraftDeleteAction = { type: 'draft delete' }
type DraftStatusAction = { type: 'draft status'; status: 'saving' | 'failed' }
type DraftSavedAction = {
  type: 'draft saved'
  title: string
  streamID: string
  doc: TileDocument
}
type NoteLoadedAction = { type: 'note loaded'; streamID: string; doc: TileDocument }
type NoteLoadingStatusAction = {
  type: 'note loading status'
  streamID: string
  status: NoteLoadingStatus
}
type NoteSavingStatusAction = {
  type: 'note saving status'
  streamID: string
  status: NoteSavingStatus
}
type Action =
  | AuthAction
  | AuthSuccessAction
  | NavResetAction
  | NavDraftAction
  | NavNoteAction
  | DraftDeleteAction
  | DraftStatusAction
  | DraftSavedAction
  | NoteLoadedAction
  | NoteLoadingStatusAction
| NoteSavingStatusActionTo handle the state transitions, we'll use a reducer function, as presented in React's documentation:
function reducer(state: State, action: Action): State {
  switch (action.type) {
    case 'auth':
      return {
        ...state,
        nav: { type: 'default' },
        auth: { status: action.status },
      }
    case 'auth success': {
      const auth = {
        status: 'done',
        ceramic: action.ceramic,
        idx: action.idx,
      } as AuthenticatedState
      return action.notes.length
        ? {
            ...state,
            auth,
            notes: action.notes.reduce((acc, item) => {
              acc[item.id] = { status: 'init', title: item.title }
              return acc
            }, {} as Record<string, IndexLoadedNote>),
          }
        : {
            auth,
            draftStatus: 'unsaved',
            nav: { type: 'draft' },
            notes: {},
          }
    }
    case 'nav reset':
      return { ...state, nav: { type: 'default' } }
    case 'nav draft':
      return {
        ...state,
        auth: state.auth as AuthenticatedState,
        nav: { type: 'draft' },
      }
    case 'draft status':
      return {
        ...state,
        auth: state.auth as AuthenticatedState,
        draftStatus: action.status,
      }
    case 'draft delete':
      return {
        ...state,
        draftStatus: 'unsaved',
        nav: { type: 'default' },
      }
    case 'draft saved': {
      return {
        auth: state.auth as AuthenticatedState,
        draftStatus: 'unsaved',
        nav: { type: 'note', streamID: action.streamID },
        notes: {
          ...state.notes,
          [action.streamID]: {
            status: 'saved',
            title: action.title,
            doc: action.doc,
          },
        },
      }
    }
    case 'nav note':
      return {
        ...state,
        auth: state.auth as AuthenticatedState,
        nav: {
          type: 'note',
          streamID: action.streamID,
        },
      }
    case 'note loaded': {
      const id = (state.nav as NavNoteState).streamID
      const noteState = state.notes[id]
      return {
        ...state,
        auth: state.auth as AuthenticatedState,
        notes: {
          ...state.notes,
          [id]: {
            status: 'loaded',
            title: noteState.title,
            doc: action.doc,
          },
        },
      }
    }
    case 'note loading status': {
      const id = (state.nav as NavNoteState).streamID
      const noteState = state.notes[id] as IndexLoadedNote
      return {
        ...state,
        auth: state.auth as AuthenticatedState,
        notes: {
          ...state.notes,
          [id]: { ...noteState, status: action.status },
        },
      }
    }
    case 'note saving status': {
      const id = (state.nav as NavNoteState).streamID
      const noteState = state.notes[id] as StoredNote
      return {
        ...state,
        auth: state.auth as AuthenticatedState,
        notes: {
          ...state.notes,
          [id]: { ...noteState, status: action.status },
        },
      }
    }
  }
}Finally, let's create a React hook wrapping this logic in high-level handlers:
export function useApp() {
  const [state, dispatch] = useReducer(reducer, {
    auth: { status: 'pending' },
    draftStatus: 'unsaved',
    nav: { type: 'default' },
    notes: {},
  })

  const authenticate = useCallback((seed: Uint8Array) => {
    dispatch({ type: 'auth', status: 'loading' })
    getIDX(seed).then(
      (init) => {
        dispatch({ type: 'auth success', ...init })
      },
      (err) => {
        console.warn('authenticate call failed', err)
        dispatch({ type: 'auth', status: 'failed' })
      },
    )
  }, [])

  const openDraft = useCallback(() => {
    dispatch({ type: 'nav draft' })
  }, [])

  const deleteDraft = useCallback(() => {
    dispatch({ type: 'draft delete' })
  }, [])

  const saveDraft = useCallback(
    (title: string, text: string) => {
      dispatch({ type: 'draft status', status: 'saving' })
      const { ceramic, idx } = state.auth as AuthenticatedState
      Promise.all([
        TileDocument.create(
          ceramic,
          { date: new Date().toISOString(), text },
          { controllers: [idx.id], schema: schemas.Note },
        ),
        idx.get<NotesList>('notes'),
      ])
        .then(([doc, notesList]) => {
          const notes = notesList?.notes ?? []
          return idx
            .set('notes', {
              notes: [{ id: doc.id.toUrl(), title }, ...notes],
            })
            .then(() => {
              const streamID = doc.id.toString()
              dispatch({ type: 'draft saved', streamID, title, doc })
            })
        })
        .catch((err) => {
          console.log('failed to save draft', err)
          dispatch({ type: 'draft status', status: 'failed' })
        })
    },
    [state.auth],
  )

  const openNote = useCallback(
    (streamID: string) => {
      dispatch({ type: 'nav note', streamID })

      if (state.notes[streamID] == null || state.notes[streamID].status === 'init') {
        const { ceramic } = state.auth as AuthenticatedState
        ceramic.loadDocument<TileDocument>(streamID).then(
          (doc) => {
            dispatch({ type: 'note loaded', streamID, doc })
          },
          () => {
            dispatch({
              type: 'note loading status',
              streamID,
              status: 'loading failed',
            })
          },
        )
      }
    },
    [state.auth, state.notes],
  )

  const saveNote = useCallback((doc: TileDocument, text: string) => {
    const streamID = doc.id.toString()
    dispatch({ type: 'note saving status', streamID, status: 'saving' })
    doc.update({ date: new Date().toISOString(), text }).then(
      () => {
        dispatch({ type: 'note saving status', streamID, status: 'saved' })
      },
      () => {
        dispatch({ type: 'note saving status', streamID, status: 'saving failed' })
      },
    )
  }, [])

  return {
    authenticate,
    deleteDraft,
    openDraft,
    openNote,
    saveDraft,
    saveNote,
    state,
  }
}Application UI
Now that our application logic is implemented, we can add the user interface, based on Material UI components.
For simplicity in this tutorial all the components are implemented in a single file, but more complex apps would gain from having the interface split into different modules.
Let's change the generated App.tsx file in the src folder, first to import the dependencies we'll use:
import AppBar from '@material-ui/core/AppBar'
import Button from '@material-ui/core/Button'
import CssBaseline from '@material-ui/core/CssBaseline'
import Dialog from '@material-ui/core/Dialog'
import DialogActions from '@material-ui/core/DialogActions'
import DialogContent from '@material-ui/core/DialogContent'
import DialogTitle from '@material-ui/core/DialogTitle'
import Divider from '@material-ui/core/Divider'
import Drawer from '@material-ui/core/Drawer'
import Hidden from '@material-ui/core/Hidden'
import IconButton from '@material-ui/core/IconButton'
import List from '@material-ui/core/List'
import ListItem from '@material-ui/core/ListItem'
import ListItemSecondaryAction from '@material-ui/core/ListItemSecondaryAction'
import ListItemText from '@material-ui/core/ListItemText'
import Paper from '@material-ui/core/Paper'
import TextareaAutosize from '@material-ui/core/TextareaAutosize'
import TextField from '@material-ui/core/TextField'
import Toolbar from '@material-ui/core/Toolbar'
import Typography from '@material-ui/core/Typography'
import {
  makeStyles,
  useTheme,
  Theme,
  createStyles,
} from '@material-ui/core/styles'
import DownloadIcon from '@material-ui/icons/CloudDownload'
import DeleteIcon from '@material-ui/icons/Delete'
import EditIcon from '@material-ui/icons/Edit'
import ErrorIcon from '@material-ui/icons/ErrorOutline'
import ListItemIcon from '@material-ui/core/ListItemIcon'
import MenuIcon from '@material-ui/icons/Menu'
import NoteIcon from '@material-ui/icons/Note'
import NoteAddIcon from '@material-ui/icons/NoteAdd'
import UploadIcon from '@material-ui/icons/CloudUpload'
import { randomBytes } from '@stablelib/random'
import React, { useRef, useState } from 'react'
import { fromString, toString } from 'uint8arrays'

import { useApp } from './state'
import type {
  AuthState,
  DraftStatus,
  IndexLoadedNote,
  State,
  StoredNote,
} from './state'Next, let's create the styles we will use:
const drawerWidth = 300

const useStyles = makeStyles((theme: Theme) =>
  createStyles({
    root: {
      display: 'flex',
    },
    drawer: {
      [theme.breakpoints.up('sm')]: {
        width: drawerWidth,
        flexShrink: 0,
      },
    },
    appBar: {
      [theme.breakpoints.up('sm')]: {
        width: `calc(100% - ${drawerWidth}px)`,
        marginLeft: drawerWidth,
      },
    },
    menuButton: {
      marginRight: theme.spacing(2),
      [theme.breakpoints.up('sm')]: {
        display: 'none',
      },
    },
    // necessary for content to be below app bar
    toolbar: theme.mixins.toolbar,
    drawerPaper: {
      width: drawerWidth,
    },
    content: {
      flexGrow: 1,
      padding: theme.spacing(3),
    },
    title: {
      flexGrow: 1,
    },
    noteSaveButton: {
      marginTop: theme.spacing(2),
    },
    noteTextarea: {
      border: 0,
      fontSize: theme.typography.pxToRem(18),
      padding: theme.spacing(2),
      width: '100%',
    },
  }),
)
Now we'll create our first component: NotesList. This component displays the list of notes in a side menu, and a button to open a draft note.
This component will get the State and needed actions injected:
type NotesListProps = {
  deleteDraft: () => void
  openDraft: () => void
  openNote: (streamID: string) => void
  state: State
}

function NotesList({
  deleteDraft,
  openDraft,
  openNote,
  state,
}: NotesListProps) {
  let draft
  if (state.nav.type === 'draft') {
    let icon
    switch (state.draftStatus) {
      case 'failed':
        icon = <ErrorIcon />
        break
      case 'saving':
        icon = <UploadIcon />
        break
      default:
        icon = <EditIcon />
    }
    draft = (
      <ListItem button onClick={() => openDraft()} selected>
        <ListItemIcon>{icon}</ListItemIcon>
        <ListItemText primary="Draft note" />
        <ListItemSecondaryAction>
          <IconButton
            edge="end"
            aria-label="delete"
            onClick={() => deleteDraft()}>
            <DeleteIcon />
          </IconButton>
        </ListItemSecondaryAction>
      </ListItem>
    )
  } else if (state.auth.status === 'done') {
    draft = (
      <ListItem>
        <ListItemIcon>
          <NoteAddIcon />
        </ListItemIcon>
        <ListItemText primary="New note" />
      </ListItem>
    )
  } else {
    draft = (
      <ListItem>
        <ListItemIcon>
          <NoteAddIcon />
        </ListItemIcon>
        <ListItemText primary="Authenticate to create note" />
      </ListItem>
    )
  }

  const notes = Object.entries(state.notes).map(([streamID, note]) => {
    const isSelected = state.nav.type === 'note' && state.nav.streamID === streamID

    let icon
    switch (note.status) {
      case 'loading failed':
      case 'saving failed':
        icon = <ErrorIcon />
        break
      case 'loading':
        icon = <DownloadIcon />
        break
      case 'saving':
        icon = <UploadIcon />
        break
      default:
        icon = isSelected ? <EditIcon /> : <NoteIcon />
    }

    return (
      <ListItem
        button
        key={streamID}
        onClick={() => openNote(streamID)}
        selected={isSelected}>
        <ListItemIcon>{icon}</ListItemIcon>
        <ListItemText primary={note.title} />
      </ListItem>
    )
  })

  return (
    <>
      <List>{draft}</List>
      <Divider />
      <List>{notes}</List>
    </>
  )
}
Another component we will need is AuthenticateScreen, that will display the authenticated ID or seed prompt as needed:

type AuthenticateProps = {
  authenticate: (seed: Uint8Array) => void
  state: AuthState
}

function AuthenticateScreen({ authenticate, state }: AuthenticateProps) {
  const [seed, setSeed] = useState('')
  const isLoading = state.status === 'loading'

  return state.status === 'done' ? (
    <Typography>Authenticated with ID {state.idx.id}</Typography>
  ) : (
    <>
      <Typography>
        You need to authenticate to load your existing notes and create new ones.
      </Typography>
      <div>
        <TextField
          autoFocus
          disabled={isLoading}
          fullWidth
          id="seed"
          label="Seed"
          onChange={(event) => setSeed(event.target.value)}
          placeholder="base16-encoded string of 32 bytes length"
          type="text"
          value={seed}
        />
      </div>
      <Button
        color="primary"
        disabled={seed === '' || isLoading}
        onClick={() => authenticate(fromString(seed, 'base16'))}
        variant="contained">
        Authenticate
      </Button>
      <Button
        color="primary"
        disabled={isLoading}
        onClick={() => setSeed(toString(randomBytes(32), 'base16'))}>
        Generate random seed
      </Button>
    </>
  )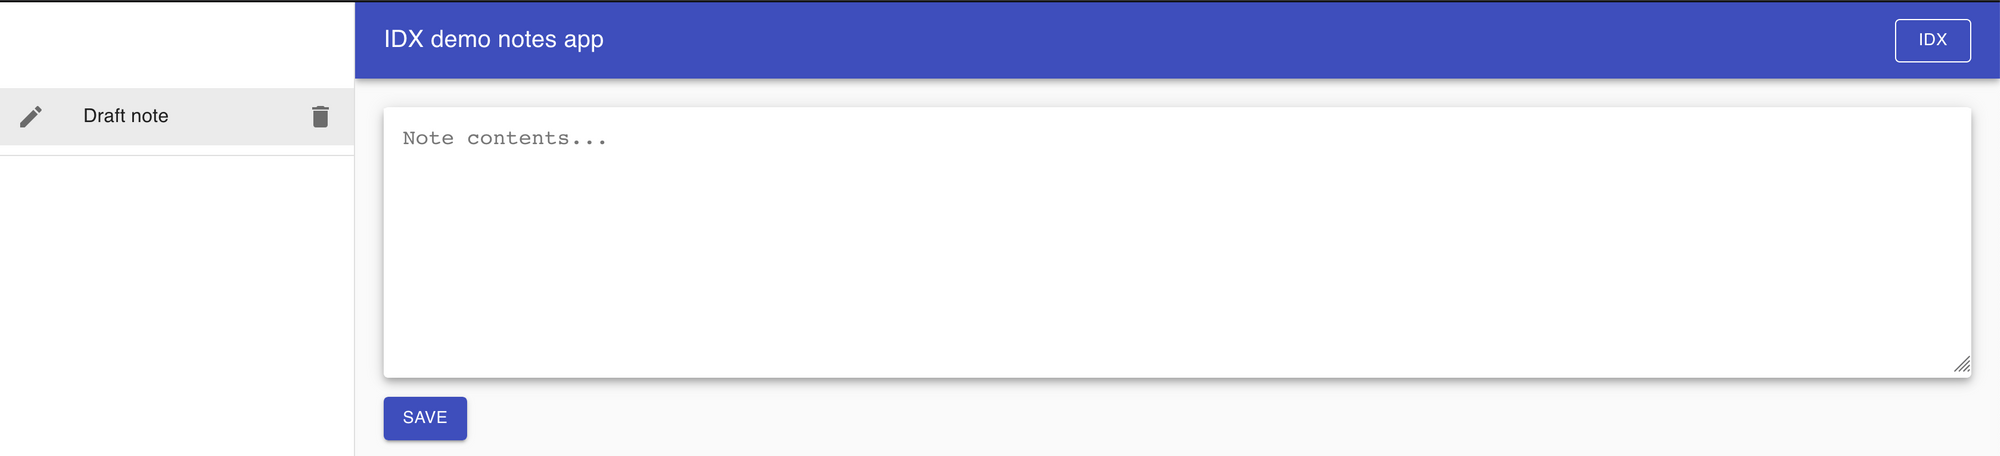
}Next, let's add the DraftScreen, allowing users to create and save a new note:
type DraftScreenProps = {
  save: (title: string, text: string) => void
  status: DraftStatus
}

function DraftScreen({ save, status }: DraftScreenProps) {
  const classes = useStyles()
  const [open, setOpen] = useState(false)
  const textRef = useRef<HTMLTextAreaElement>(null)
  const titleRef = useRef<HTMLInputElement>(null)

  const handleOpen = () => {
    setOpen(true)
  }

  const handleClose = () => {
    setOpen(false)
  }

  const handleSave = () => {
    const text = textRef.current?.value
    const title = titleRef.current?.value
    if (text && title) {
      save(title, text)
    }
    setOpen(false)
  }

  return (
    <>
      <Dialog
        open={open}
        onClose={handleClose}
        aria-labelledby="form-dialog-title">
        <DialogTitle id="form-dialog-title">Save note</DialogTitle>
        <DialogContent>
          <TextField
            autoFocus
            margin="dense"
            id="title"
            label="Note title"
            inputRef={titleRef}
            type="text"
            fullWidth
          />
        </DialogContent>
        <DialogActions>
          <Button onClick={handleClose} color="primary">
            Cancel
          </Button>
          <Button onClick={handleSave} color="primary" variant="outlined">
            Save note
          </Button>
        </DialogActions>
      </Dialog>
      <Paper elevation={5}>
        <TextareaAutosize
          className={classes.noteTextarea}
          placeholder="Note contents..."
          ref={textRef}
          rowsMin={10}
          rowsMax={20}
        />
      </Paper>
      <Button
        className={classes.noteSaveButton}
        color="primary"
        disabled={status === 'saving'}
        onClick={handleOpen}
        variant="contained">
        Save
      </Button>
    </>
  )
}
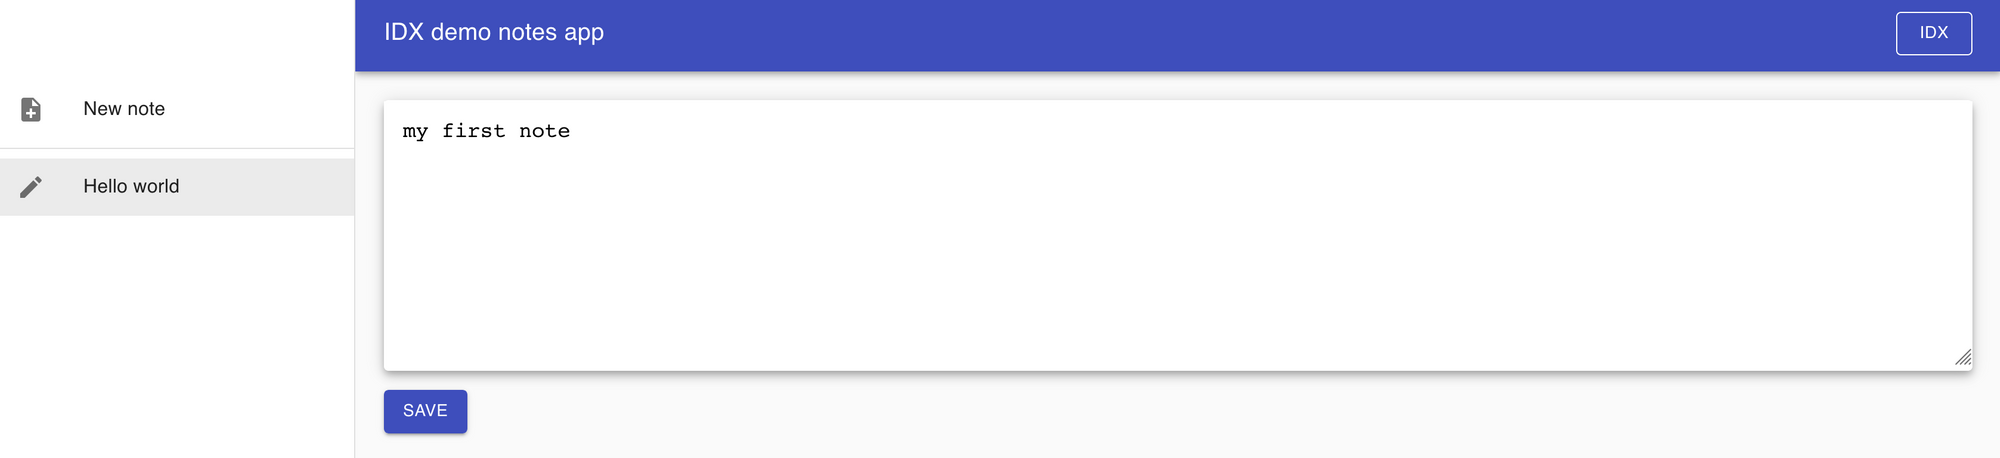
We will use another component, NoteScreen, for displaying an existing note as the logic is a bit different from a draft, notably that we have to first load the document from Ceramic before being able to display the note contents:
type NoteScreenProps = {
  note: IndexLoadedNote | StoredNote
  save: (doc: TileDocument, text: string) => void
}

function NoteScreen({ note, save }: NoteScreenProps) {
  const classes = useStyles()
  const textRef = useRef<HTMLTextAreaElement>(null)

  if (note.status === 'loading failed') {
    return <Typography>Failed to load note!</Typography>
  }

  if (note.status === 'init' || note.status === 'loading') {
    return <Typography>Loading note...</Typography>
  }

  const doc = (note as StoredNote).doc
  return (
    <>
      <Paper elevation={5}>
        <TextareaAutosize
          className={classes.noteTextarea}
          defaultValue={doc.content.text}
          placeholder="Note contents..."
          ref={textRef}
          rowsMin={10}
          rowsMax={20}
        />
      </Paper>
      <Button
        className={classes.noteSaveButton}
        color="primary"
        disabled={note.status === 'saving'}
        onClick={() => save(doc, textRef.current?.value ?? '')}
        variant="contained">
        Save
      </Button>
    </>
  )
}
Finally, we can use all these components in the top-level App component exported by this module:
export default function App() {
  const app = useApp()
  const classes = useStyles()
  const theme = useTheme()
  const [mobileOpen, setMobileOpen] = useState(false)

  const handleDrawerToggle = () => {
    setMobileOpen(!mobileOpen)
  }

  const drawer = (
    <div>
      <div className={classes.toolbar} />
      <NotesList
        authenticate={app.authenticate}
        deleteDraft={app.deleteDraft}
        openDraft={app.openDraft}
        openNote={app.openNote}
        state={app.state}
      />
    </div>
  )

  let screen
  switch (app.state.nav.type) {
    case 'draft':
      screen = (
        <DraftScreen save={app.saveDraft} status={app.state.draftStatus} />
      )
      break
    case 'note':
      screen = (
        <NoteScreen
          key={app.state.nav.streamID}
          note={app.state.notes[app.state.nav.streamID]}
          save={app.saveNote}
        />
      )
      break
    default:
      screen = (
        <AuthenticateScreen
          authenticate={app.authenticate}
          state={app.state.auth}
        />
      )
  }

  return (
    <div className={classes.root}>
      <CssBaseline />
      <AppBar position="fixed" className={classes.appBar}>
        <Toolbar>
          <IconButton
            color="inherit"
            aria-label="open drawer"
            edge="start"
            onClick={handleDrawerToggle}
            className={classes.menuButton}>
            <MenuIcon />
          </IconButton>
          <Typography className={classes.title} noWrap variant="h6">
            IDX demo notes app
          </Typography>
          <Button color="inherit" href="<https://idx.xyz>" variant="outlined">
            IDX
          </Button>
        </Toolbar>
      </AppBar>
      <nav className={classes.drawer} aria-label="notes">
        <Hidden smUp implementation="css">
          <Drawer
            variant="temporary"
            anchor={theme.direction === 'rtl' ? 'right' : 'left'}
            open={mobileOpen}
            onClose={handleDrawerToggle}
            classes={{ paper: classes.drawerPaper }}
            ModalProps={{ keepMounted: true }}>
            {drawer}
          </Drawer>
        </Hidden>
        <Hidden xsDown implementation="css">
          <Drawer
            classes={{ paper: classes.drawerPaper }}
            variant="permanent"
            open>
            {drawer}
          </Drawer>
        </Hidden>
      </nav>
      <main className={classes.content}>
        <div className={classes.toolbar} />
        {screen}
      </main>
    </div>
  )
}
That's it!
You should now be able to start the app using the npm start command that will compile and start a local server.
The application logic and UI in this tutorial is intentionally kept simple for demonstration purposes, but could be greatly improved for a real app.
The full code for this tutorial is available on GitHub if you want to use it as a basis for your own experiments.
Moving to production
Using a local Ceramic node is an easy way to get started developing an app, but what about production use cases?
We are working with infrastructure partners who are eager to provide production-grade Ceramic node hosting services that we will recommend once ready. Other options are for you to host a Ceramic node for your users, or alternatively, build your app using a full Ceramic node in-browser with @ceramicnetwork/core (instead of the @ceramicnetwork/http-client used in this tutorial). Future tutorials and guides will dive into how to set up production Ceramic deployments.
In the meantime, feel free to reach out on the Ceramic Discord if you need support deploying Ceramic.
What's next?
Learn more about IDX by visiting the IDX website and documentation.
If you need any help or just want to say hi, join the IDX Discord channel!