
Tutorial: Getting Started With ComposeDB on Ceramic
Use this tutorial and Web3 example app to get started building quickly with ComposeDB on Ceramic.


ComposeDB on Ceramic is a decentralized, composable graph database that empowers developers to store and interact with their application data efficiently and swiftly. By integrating Ceramic infrastructure with an indexer, reusable data models, and GraphQL, ComposeDB paves the way for the creation of truly interoperable and composable Web3 applications.
The core Ceramic team recently unveiled a new CLI tool named Wheel. This tool simplifies the process of running Ceramic nodes locally. Moreover, it incorporates a straightforward Web3 social application that developers can utilize to interact with ComposeDB on Ceramic, or even leverage it as a foundation for their unique projects. This tutorial will guide you through using Wheel and the embedded example Web3 social application, enabling you to engage with ComposeDB on Ceramic in a matter of minutes.
By adhering to this guide, you will accomplish the following:
- Configure your development environment
- Run a local Ceramic node
- Operate a fully functional example dApp on your local machine
- Understand the subsequent steps to continue building on Ceramic
If you'd like a visual walkthrough, check out this video that illustrates all of the setup steps written below:
Requirements
For this tutorial, ensure you have the following tools and resources installed on your system:
- A code editor that suits your preferences (for example, VSCode)
- A web browser that you're comfortable with (we'll be using Chrome for this guide)
- Node.js v16 or a newer version
- jq
After you've installed the necessary dependencies and prepped your development tools as outlined above, you can dive into setting up your work environment with Wheel.
Configure your working environment
When it comes to building applications using ComposeDB, it's essential for every developer to run their own node. This step ensures your node can connect to the Ceramic Anchor Service to generate commits on a blockchain, thereby enabling seamless data composability between applications.
First, let’s create our project folder where we will keep all the files and directories used for this tutorial. Open your terminal and run the following commands:
mkdir ceramic-getting-started
cd ceramic-getting-started
The most straightforward path to configure and run a Ceramic node is through Wheel—a user-friendly CLI tool. Wheel not only allows developers to run Ceramic nodes locally, but it also walks you through the entire configuration process with a clear, easy-to-understand prompt.
Note, for more visual walkthrough, check out this video which illustrates all of the setup steps written below:
To download the Wheel on your local machine, run the command below. This command will download the Wheel in your working directory:
curl --proto '=https' --tlsv1.2 -sSf https://raw.githubusercontent.com/ceramicstudio/wheel/main/wheel.sh | bash
Once downloaded, start the Wheel by running the following command:
./wheel
Executing this command will kick-start the environment configuration prompt. Here, you'll have the ability to select which Ceramic-specific dependencies you'd prefer to install, and how you'd like your Ceramic node to be configured.
If you're brand new to ComposeDB on Ceramic, we suggest you begin with the default setup. This configuration is lightweight and easy to manage.
📌 The default configuration will run your Ceramic node in-memory, meaning it won't connect to the Ceramic Anchor Service or create commits on a blockchain. Therefore, your app data will only be saved locally on your machine. The indexed data will be housed in a straightforward and lightweight SQLite database, requiring no additional configurations on your part. This setup serves as an excellent launchpad to start engaging with ComposeDB on Ceramic and to experiment with its features.
Simply follow the prompt and confirm the following default configurations by hitting return key on your keyboard:
- Project Type:
InMemory - Project Name:
ceramic-test-app - Project Path:
default - Include Ceramic?:
Y - Include ComposeDB?:
Y - Include ComposeDB Sample Application?:
Y - Admin DID Configuration:
Generate DID and Private Key - File to save DID private key to?:
default - Wheel config file location:
default - Configure Ceramic?:
Defaults: Use default configuration based on network
At this point, the Wheel will start the process of installing dependencies. Once complete, you'll be prompted with the question, Would you like Ceramic started as a daemon? (Y/n). Choose option Y. This action will fire up your local Ceramic node and construct an example app for you to experiment with. You'll know everything is up and running smoothly if you see the following output in your terminal:
Application demo is available at
Users/user/ceramic-getting-started/wheel/ceramic-test-app/ceramic-test-app-app. To run the demo application:

cd /Users/user/ceramic-getting-started/wheel/ceramic-test-app/ceramic-test-app-app
npm run nextDev
Keep this terminal running and now let’s dive into the example Web3 social application!
Example Web3 social application
The example Web3 social app, a simple example of decentralized Twitter, is a creation of the 3Box Labs team. It's designed to offer developers a glimpse into how applications work with ComposeDB on Ceramic, and serves as an example of how to implement the basic core functionality using Ceramic tools.
The application comes packed with the following features:
- Sign-in using DID Key or your Metamask wallet
- User profile creation
- Post creation
- The ability to follow other users
- Access to the posts of those you follow on an 'Explore' page
So, you may ask, how do you launch this application? At the end of the previous section, we noted the output you should expect to see in your terminal if everything is operating smoothly:
Application demo is available at
/Users/user/ceramic-getting-started/wheel/ceramic-test-app/ceramic-test-app-app. To run the demo application:

cd /Users/user/ceramic-getting-started/wheel/ceramic-test-app/ceramic-test-app-app
npm run nextDev
Follow the provided instructions to navigate to the example app directory and start the application:
cd /Users/user/ceramic-getting-started/wheel/ceramic-test-app/ceramic-test-app-app
npm run nextDev
The output of this command will look similar to the one shown below.
> demo@0.1.0 nextDev
> next dev

ready - started server on 0.0.0.0:3000, url: <http://localhost:3000>
Copy the provided url http://localhost:3000 and open it in your browser. This will launch the example application in your browser for you to interact with.
Interacting with the application
Once you open the URL that your application is running on, you should be greeted with the following user interface:
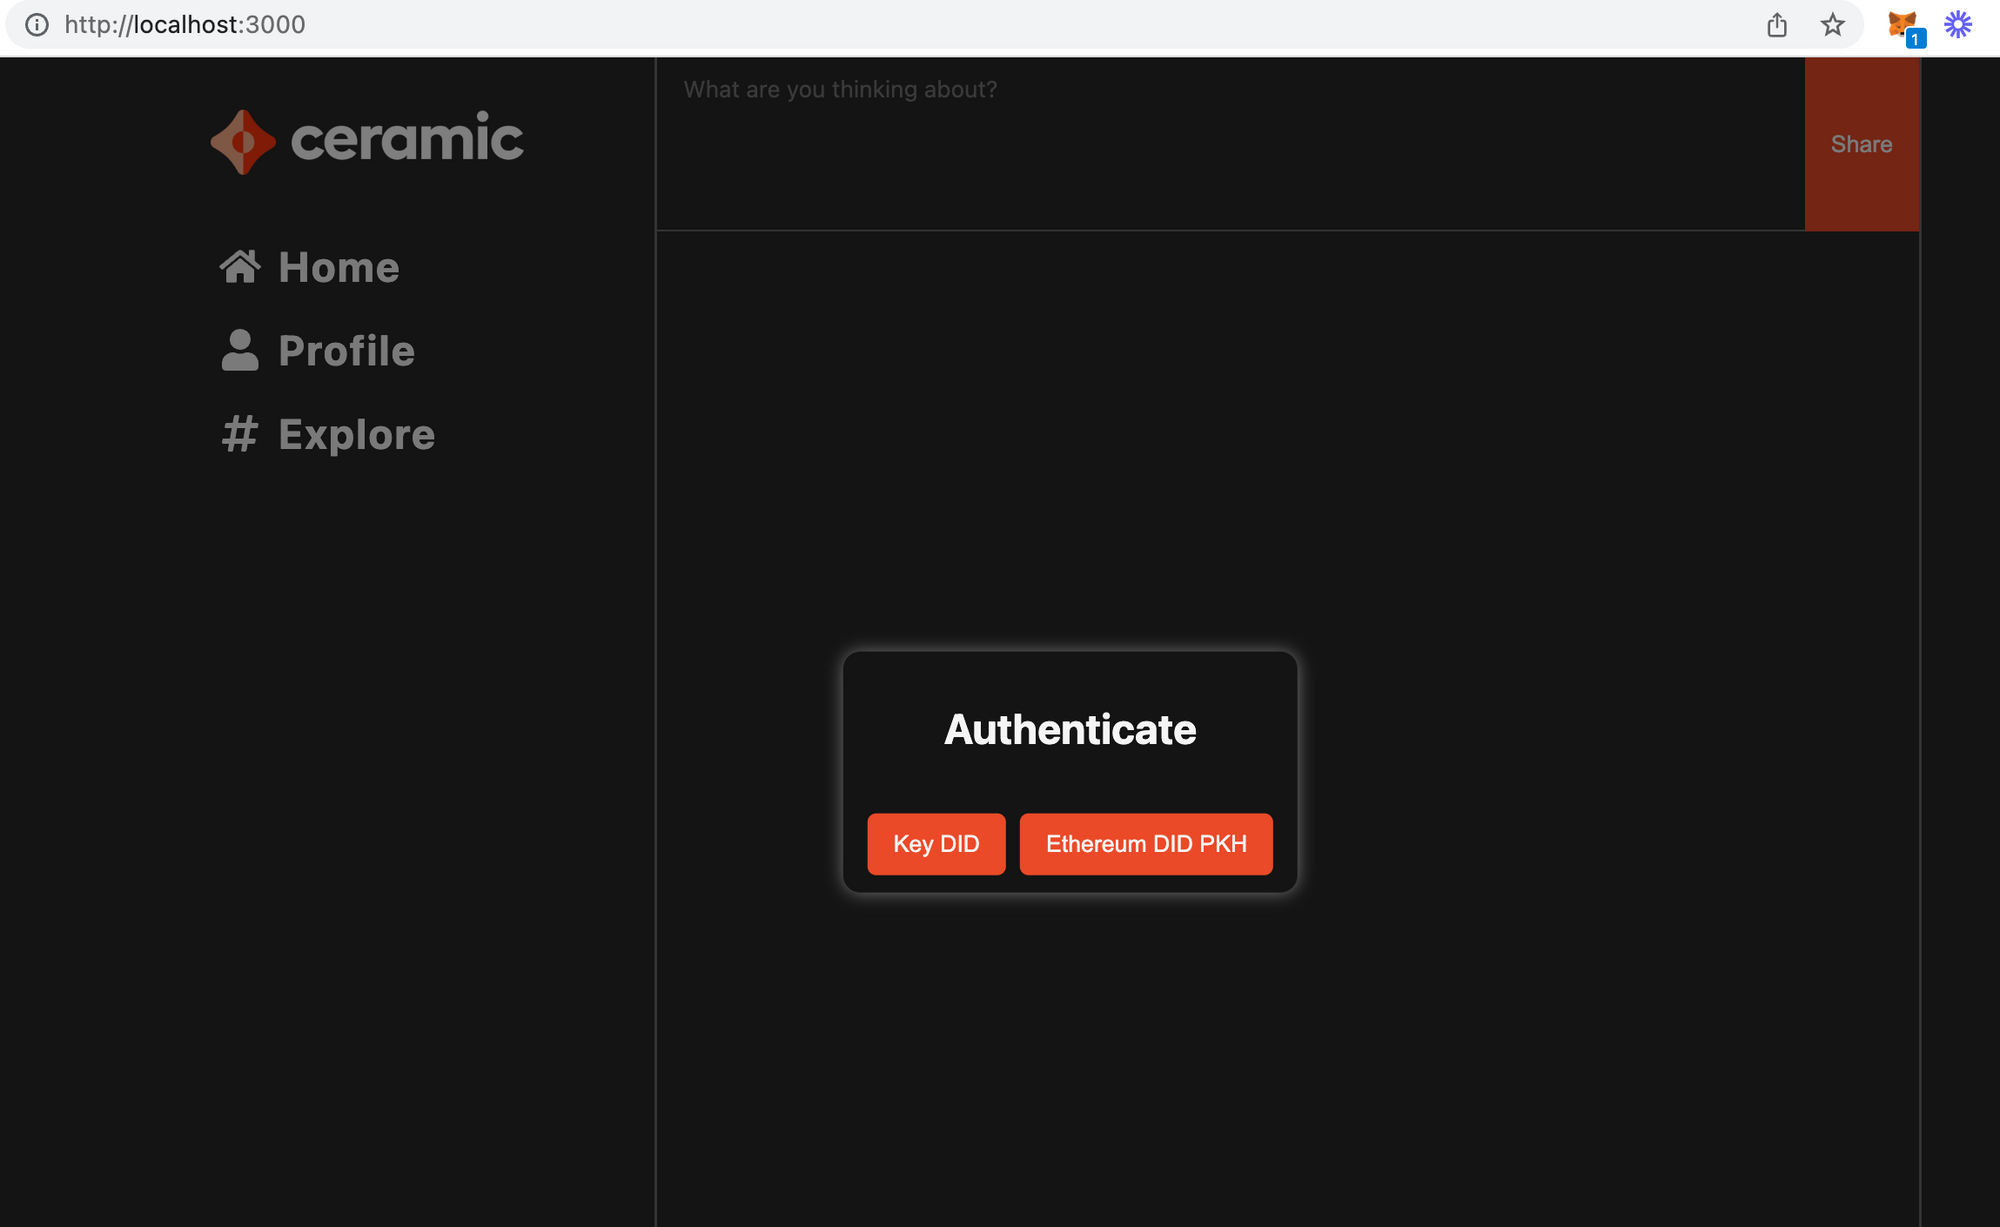
At this point ,you can start interacting with the application by choosing your authentication method. You can choose from the following options:
- Key DID—an authentication method using
did:keymethod - Ethereum DID PKH—an authentication method that uses an Ethereum wallet (e.g. Metamask)
Choose the authentication method that you prefer and start interacting with the application:
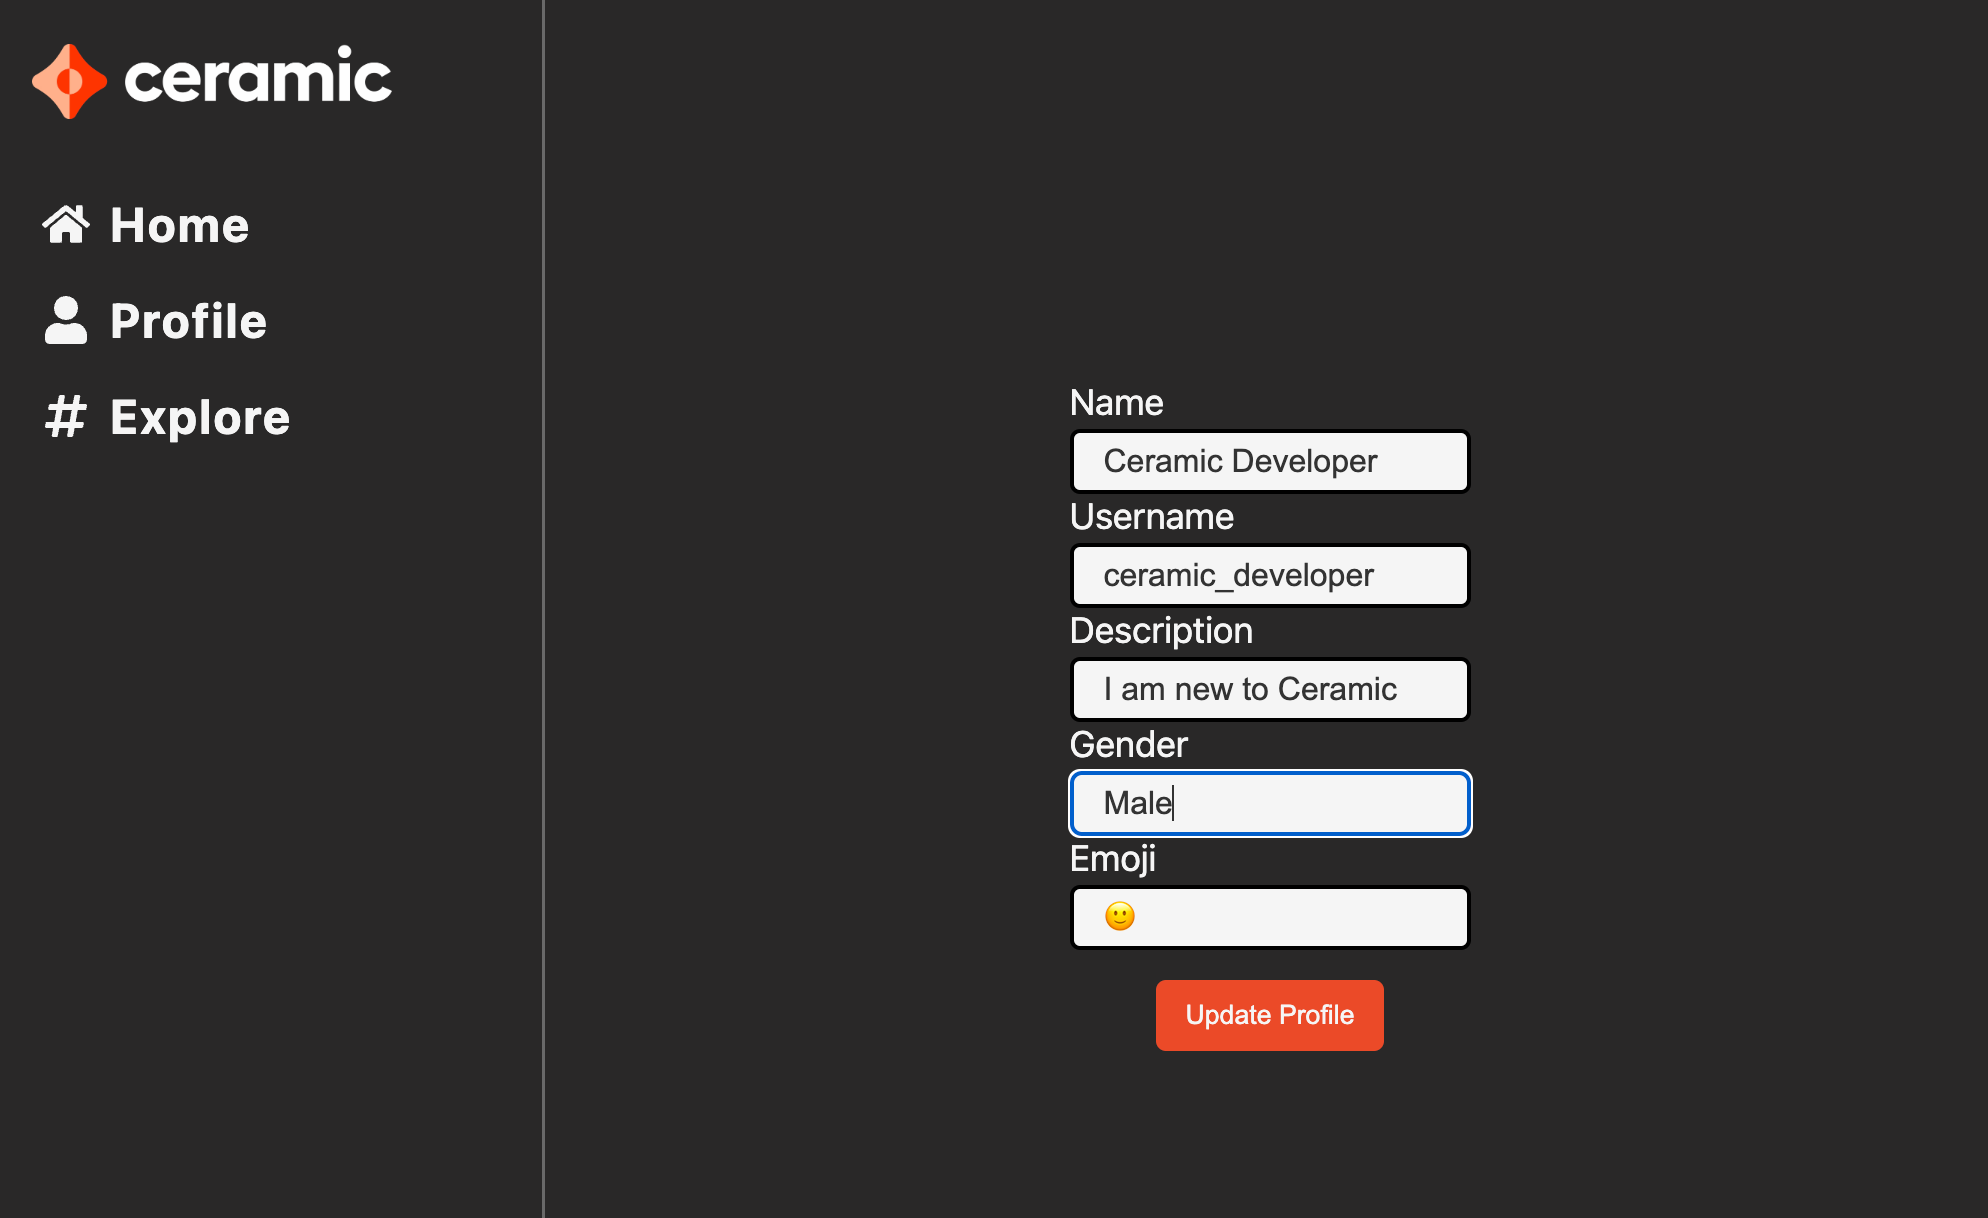
- Click on Profile tab and create your profile:
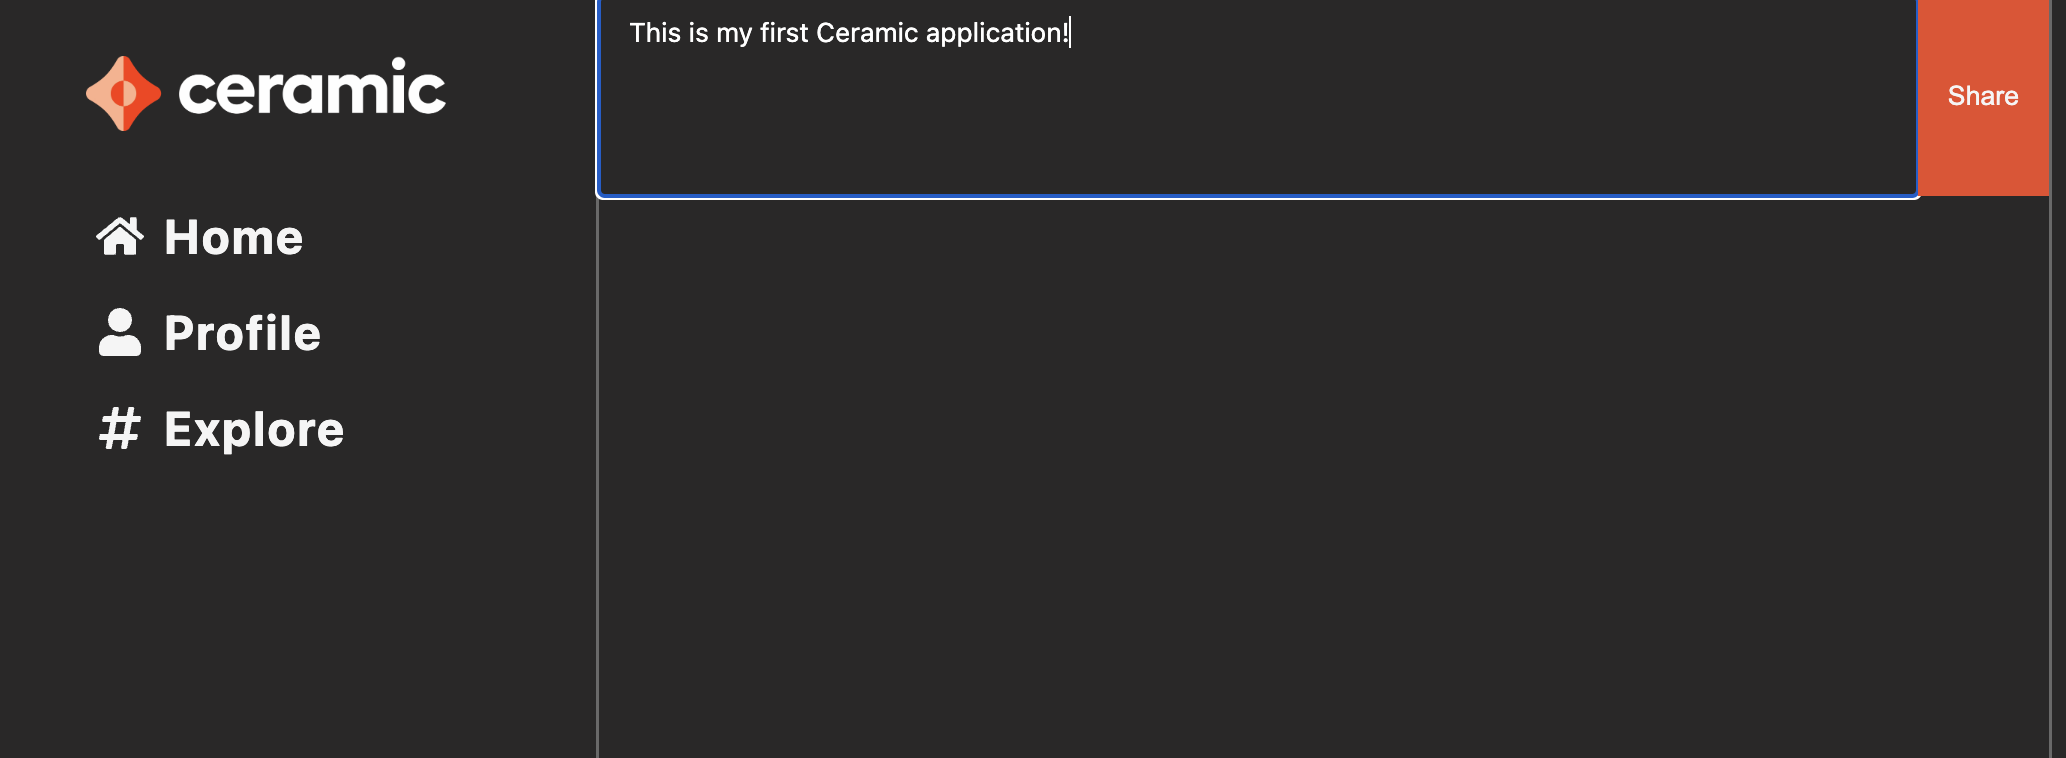
2. After creating your profile, head to Home tab and create your first post:
3. Head to Explore tab and check out currently existing posts. You should see your own post posted there:
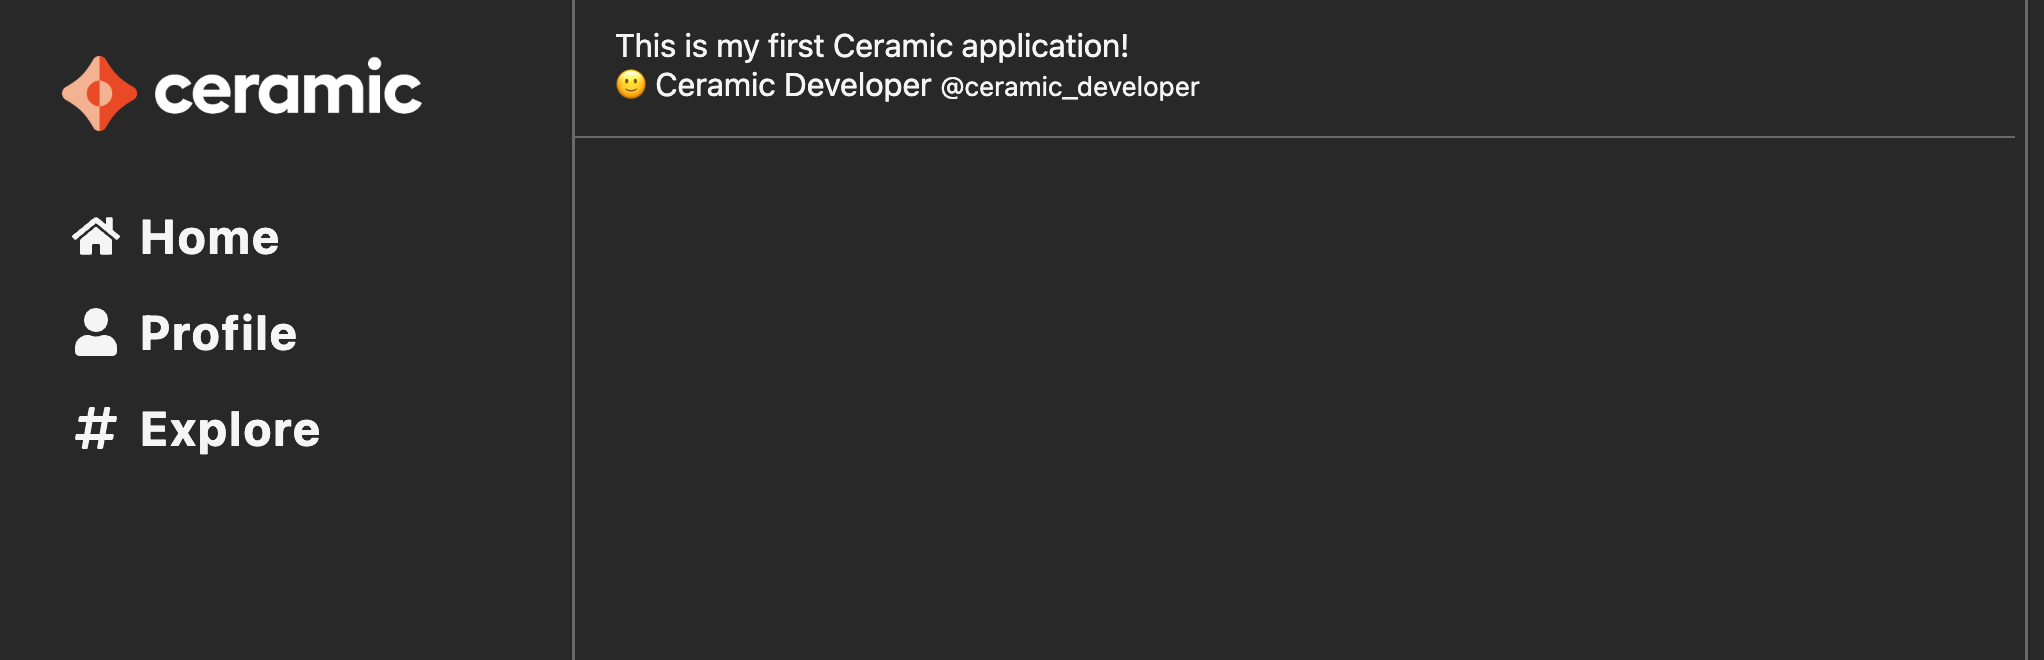
If other users started using your application, you would be able to see their posts in the Explore section as well. This would also give you an option to follow other users. You can simulate this behavior by logging out and signing up for the application using a different authentication method.
Explore what’s under the hood
One of the best things about this example application is that you can see everything under the hood, including all of the implementation, data models, and frontend components.
Remember the path that was provided to you by Wheel? You can find all of the application files there:
Application demo is available at
/Users/user/ceramic-getting-started/wheel/ceramic-test-app/ceramic-test-app-app
Once you navigate to the project directory you should see the following files:
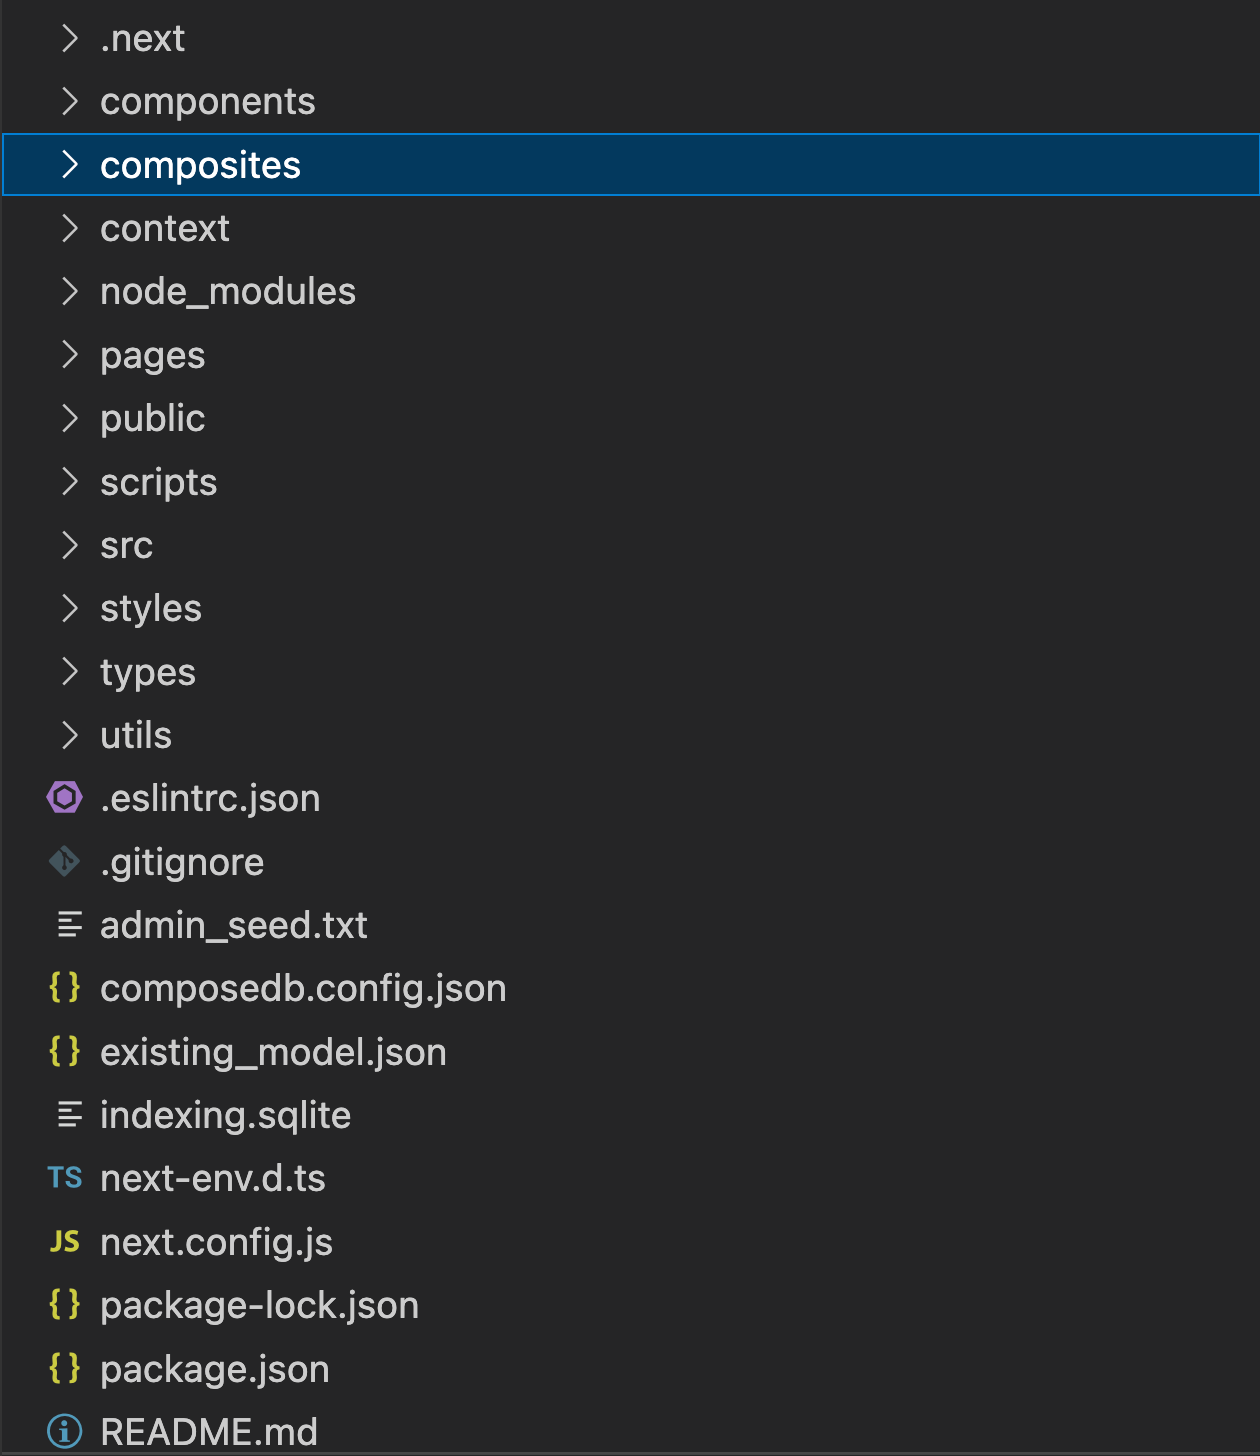
When you navigate to the composites directory, you'll discover all the data models utilized by this application defined using the GraphQL schema definition language. The application comes with four data models:
basicProfile.graphql- This data model offers a GraphQL implementation of a fundamental user profile data modelpost.graphql- This data model provides a GraphQL implementation of a user post. It also delineates a relation to thebasicProfilemodelpostsProfile.graphql- This data model establishes a relation between thebasicProfilemodel and thepostmodelfollowing.graphql- This data model outlines a schema for preserving the data of the users being followed. Notably, this model also defines a relation to thebasicProfilemodel, enabling user profile data retrieval
Make sure to open these files to explore how data models are defined and how they tie to the details you see on the frontend. For example, if you open basicProfile.grapqh you’ll probably recognize the fields like name, username, description, gender and emoji you set when creating your profile:
type BasicProfile @createModel(accountRelation: SINGLE, description: "A basic Profile") {
  name: String! @string(minLength: 3, maxLength: 100)
  username: String! @string(minLength: 5, maxLength: 255)
  description: String @string(minLength: 3, maxLength: 100)
  gender: String @string(minLength: 3, maxLength: 100)
  emoji: String @string(minLength: 1, maxLength: 2)
}
In addition to data models, you can explore the the pages directory that contains the implementation of pages you see when you interact with the application. There you can see some examples of how Grapqhl queries are used to retrieve and display the information you see. For example, if you open the explore.ts file, you will see an example query that is used to extract the data that is displayed once your open the Explore page on your app:
query {
        postsIndex (last:300) {
          edges {
            node {
              id
              body
              created
              profile {
                id
                name
                username
                emoji
              }
            }
          }
        }
      }
Interact with the data using Graphiql server
As you engage with the example Web3 social app, you're creating user data that's stored on the Ceramic network (this depends on the project-type you selected when setting up your Ceramic node). You can smoothly interact with this data using a straightforward Graphiql server and crafting GraphQL queries. Here’s how you can accomplish this:
- Open a new terminal and generate a runtime representation of your composite:
npx composedb composite:compile src/__generated__/merged.json src/__generated__/runtime-composite.json
2. Start the Graphiql server:
npx composedb graphql:server --ceramic-url=http://localhost:7007 --graphiql src/__generated__/runtime-composite.json --port=5005You will know that the server is successfully up and running if you see the following output in your terminal:
GraphQL server is listening on <http://localhost:5005/grapqhl>
3. Copy the provided URL and open it in your browser. This should open a Graphiql interface. This interface has 3 core parts:
- Top left terminal for writing the GraphQL queries
- Bottom left section for providing variables and headers for your queries
- Section on the right for displaying the query output
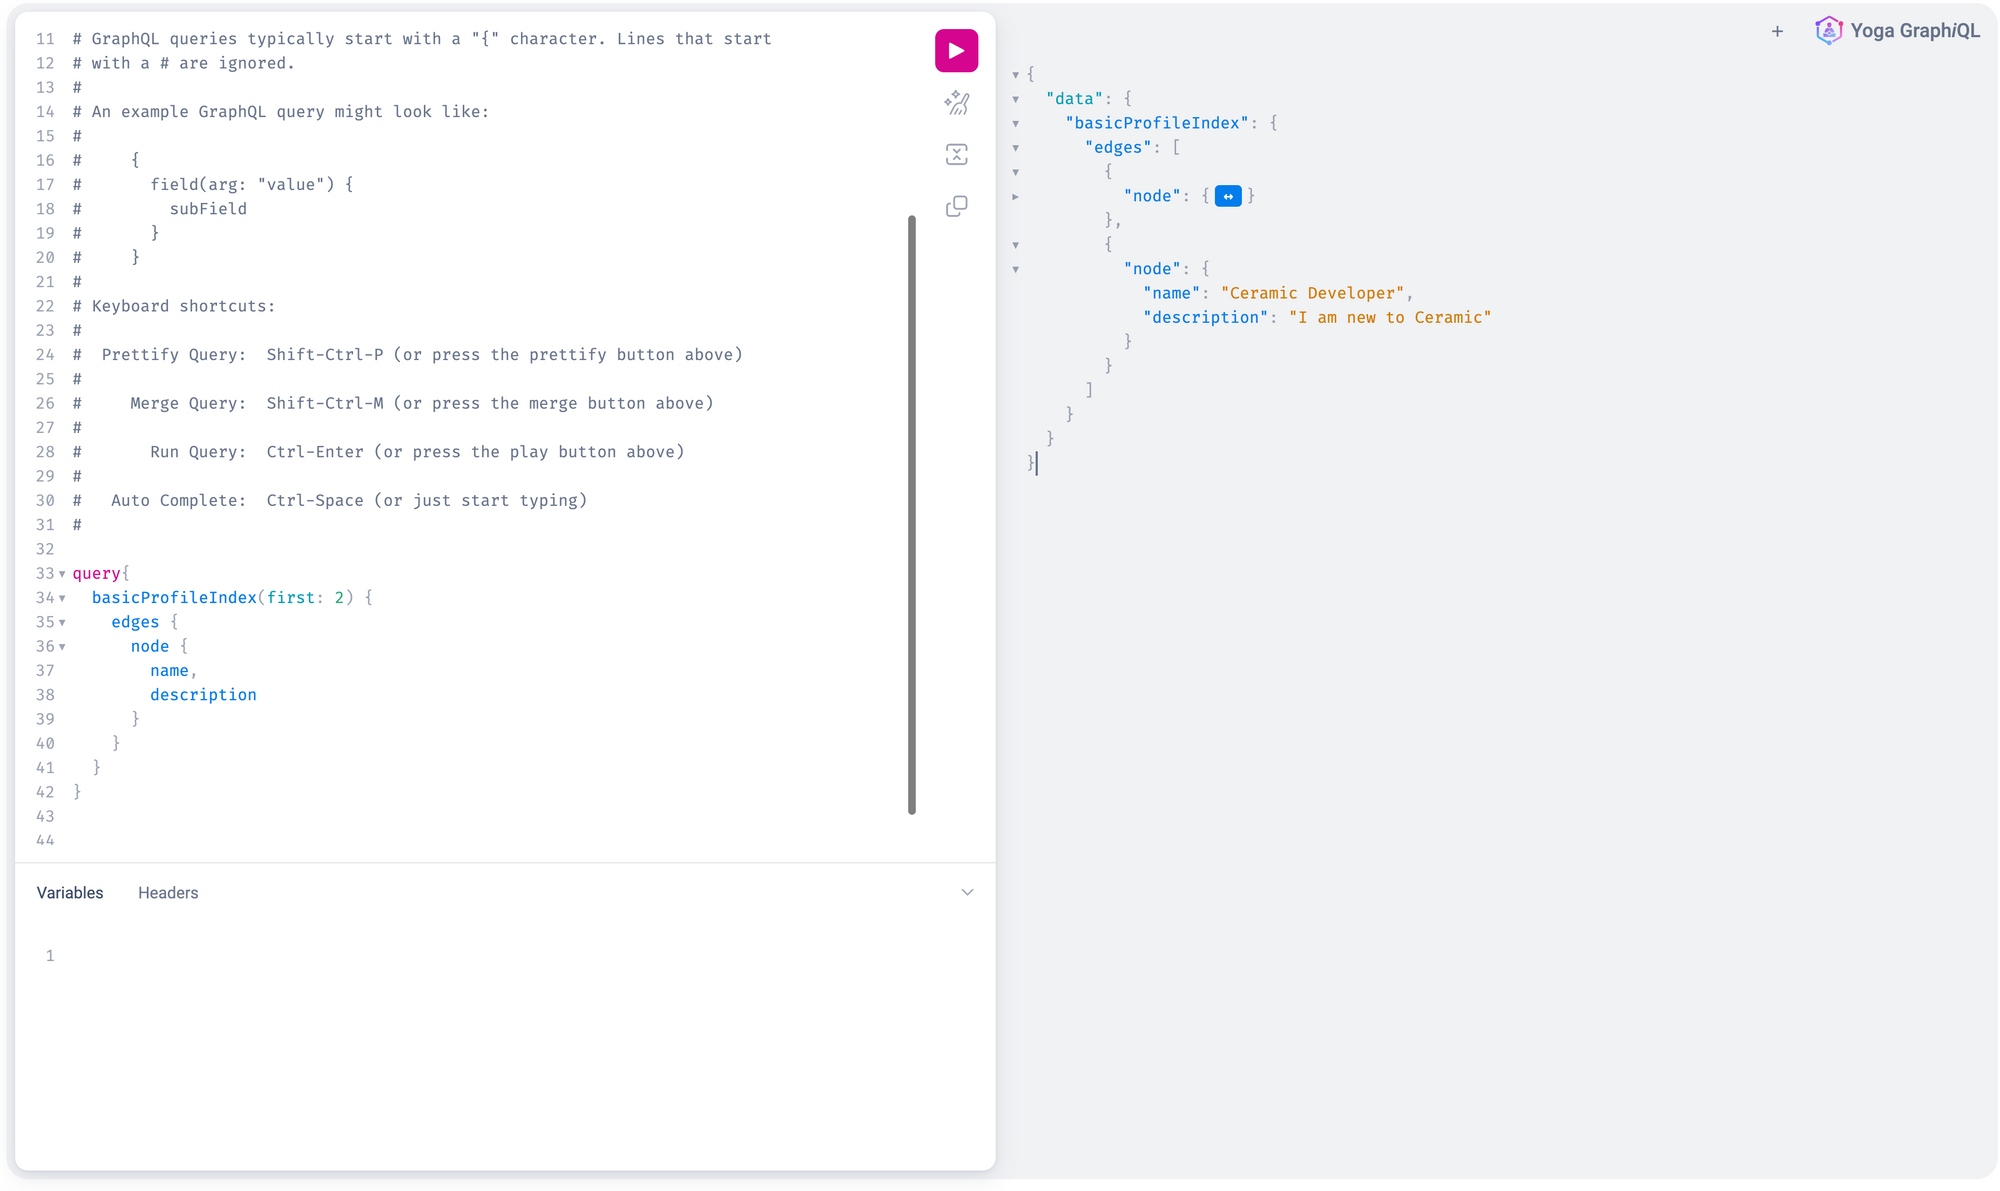
4. Run the following query to get the first 2 records of the user profile stored:
query{
 basicProfileIndex(first: 2) {
   edges {
     node {
       name,
       description
     }
   }
 }
}
The output of this query looks as follows:
Next steps
The integration of Wheel and the example Web3 app aims to provide developers with an easy starting point. It simplifies the process of running Ceramic nodes and offers a tangible application to experiment with. If you've followed this tutorial, here are some promising next steps to continue your journey as a Ceramic developer:
- Dive into the ComposeDB documentation to familiarize yourself more with the technical concepts discussed in this tutorial
- Interact with the data by constructing more advanced GraphQL queries, or even update an existing record by executing a mutation
- Launch the example app on
clay-testnetwhich will connect your node to Ceramic Anchor Service and create commits on a blockchain. You can achieve this by selecting theclay-testnetproject type when following the Wheel prompt - Improve the application—introduce a new feature or use it as a foundation for your own unique project. Here are some ideas for you to consider:
- Add a feature to "like" a post.
- Create more sophisticated queries to filter the posts displayed on the "Explore" page
- Introduce a feature to comment on a post
We're eager to see what you'll create! Don't hesitate to share your projects with us on our community forum!